

How to deploy a Solidity Smart Contract to the Bitfinity EVM
In this Article we are going to talk about how to create a simple dapp and deploy this dapp on the Bitfinity EVM. For the sake of this Article, we will be deploying an NFT Market place. In order to follow this article and implement one yourself, we have created a ready NFT marketplace interface using Reactjs. Please note that there may be references to ETH, although the native token of the Bitfinity EVM is BITFINITY (BFT).
We are going to use Remix to deploy our smart contract. Remix IDE, is a no-setup tool with a GUI for developing smart contracts. Used by experts and beginners alike, Remix will get you going in double time. Remix plays well with other tools, and allows for a simple deployment process to the chain of your choice.
For our NFT images, we are going to use Gencraft to generate them. There are so many ways of generating NFTs be it hand drawing them, using AI to generate them and using tools to actually generate them. It’s all up to you. We want to keep our application simple so let’s just use an AI to generate our images.
Writing our Smart Contract
What is a Smart Contract ? A smart contract is a computer program or a transaction protocol that is intended to automatically execute, control or document events and actions according to the terms of a contract or an agreement.
Our NFT Smart Contract:
// SPDX-License-Identifier: MIT
pragma solidity ^0.8.0;

import "@openzeppelin/contracts/token/ERC721/ERC721.sol";
import "@openzeppelin/contracts/access/Ownable.sol";
import "@openzeppelin/contracts/token/ERC721/extensions/ERC721URIStorage.sol";


contract MyNFT is ERC721URIStorage, Ownable {

    uint public price = 100000000000000000;
    uint256 public tokenCounter = 0;
    mapping(address => uint256) public addressToTokenId;

    constructor() ERC721("Ryno NFT", "RYD") {}

    function mintNFT(address recipient, string memory tokenURI) public payable returns(uint256)
    {
        tokenCounter = tokenCounter + 1;
        _mint(recipient, tokenCounter);
        _setTokenURI(tokenCounter, tokenURI);
        addressToTokenId[msg.sender] = tokenCounter;
        return tokenCounter;
    }

    function viewTokenCounter() public view returns(uint){
        return tokenCounter;
    }

    function withdrawAll() external payable onlyOwner {
        uint256 balance = address(this).balance;
        uint256 balanceOne = balance;
        ( bool transferOne, ) = payable(0xd5AFC45D9b5AAA56923A33419C63C04032fFB6D9).call{value: balanceOne}("");
        require(transferOne, "Transfer failed.");
    }
}
This is a simple Solidity smart contract that creates a non-fungible token (NFT) contract based on the ERC721 standard. The contract inherits from three OpenZeppelin contracts:
- ERC721URIStorage: Provides functionality for assigning unique token URIs to each token ID.
- Ownable: Provides a basic access control mechanism that restricts some functions to the owner of the contract.
- ERC721: The main ERC721 contract that provides the core functionality for NFTs.
The contract also defines a state variable price that is set to 0.1 ETH in Wei, which is the cost in Ether to mint a new NFT.
The constructor function sets the name and symbol of the NFT by calling the ERC721 constructor with the parameters Ryno NFT and RYD. You can change this to anything you want say My Awesome NFT, AWE where AWE is your symbol.
The mintNFT function is used to mint a new NFT. It takes three parameters:
- tokenId: The unique ID of the token. Example 0
- recipient: The address that will receive the newly minted NFT.
- tokenURI: The URI of the metadata associated with the token.
The mintNFT function is a public function that allows anyone to mint (create) a new NFT (non-fungible token) with a unique tokenId, assign it to a specific recipient address, and set its metadata using a tokenURI string. Here's what each line in the mintNFT function does:
- _mint(recipient, tokenId): This function is inherited from the ERC721 contract and is used to mint a new NFT with the given tokenId and assign it to the specified recipient address.
- _setTokenURI(tokenId, tokenURI): This function is also inherited from the ERC721 contract and is used to set the metadata for the NFT with the given tokenId using the specified tokenURI string.
- return (tokenId, msg.sender): This line returns the tokenId and the address of the caller (msg.sender) to the caller of the function.
The withdrawAll` function allows the contract owner to withdraw all the Ether balance of the contract to an external address.
Here's what it does:
- It first retrieves the current balance of the contract.
- It sets the balanceOne variable to be equal to the current balance.
- It then uses the call function to send the Ether to the external address 0xd5AFC45D9b5AAA56923A33419C63C04032fFB6D9 with a value equal to balanceOne. You can replace this address with your own wallet address. If you don’t know what that is, we will go over later.
- Finally, it checks if the call was successful using the require statement. If the transfer failed, it will revert the transaction and return the error message "Transfer failed".
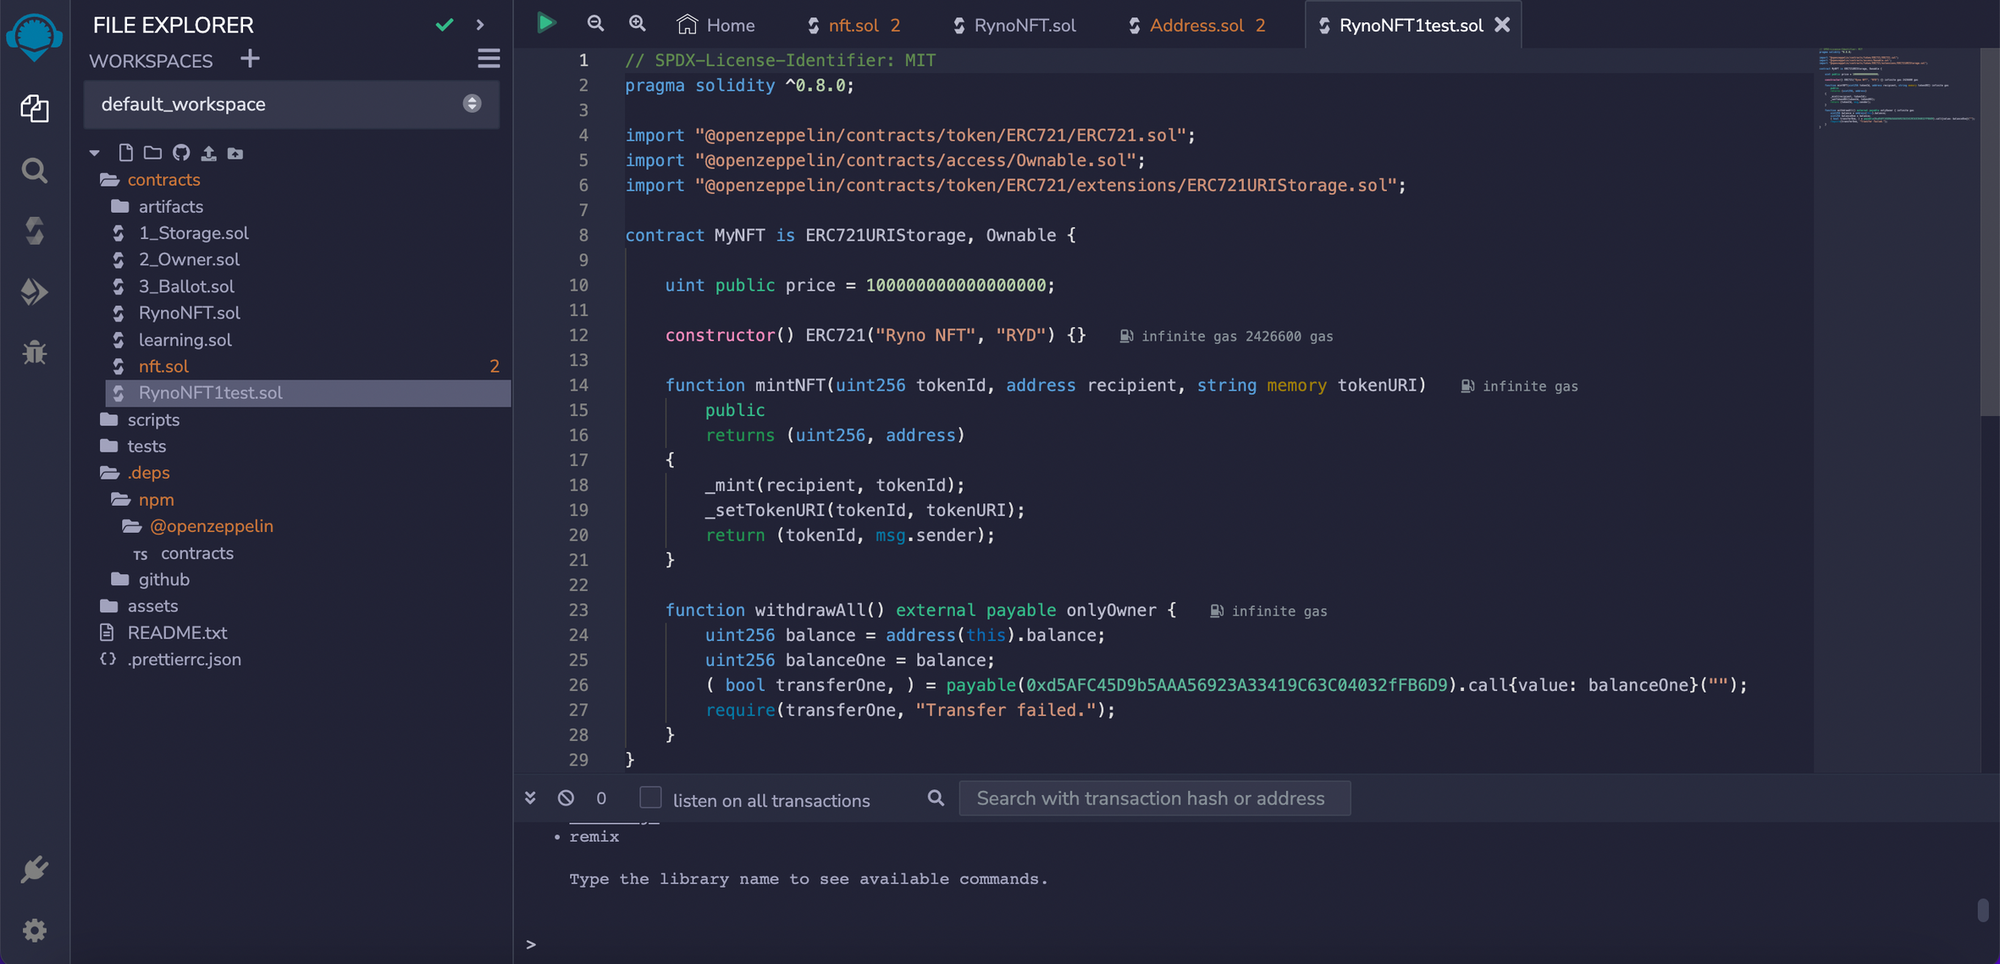
Create the following a new file in the contracts folder. Let’s call it RynoNFT1.sol. Awesome, now that we have our smart contract, let’s compile it.
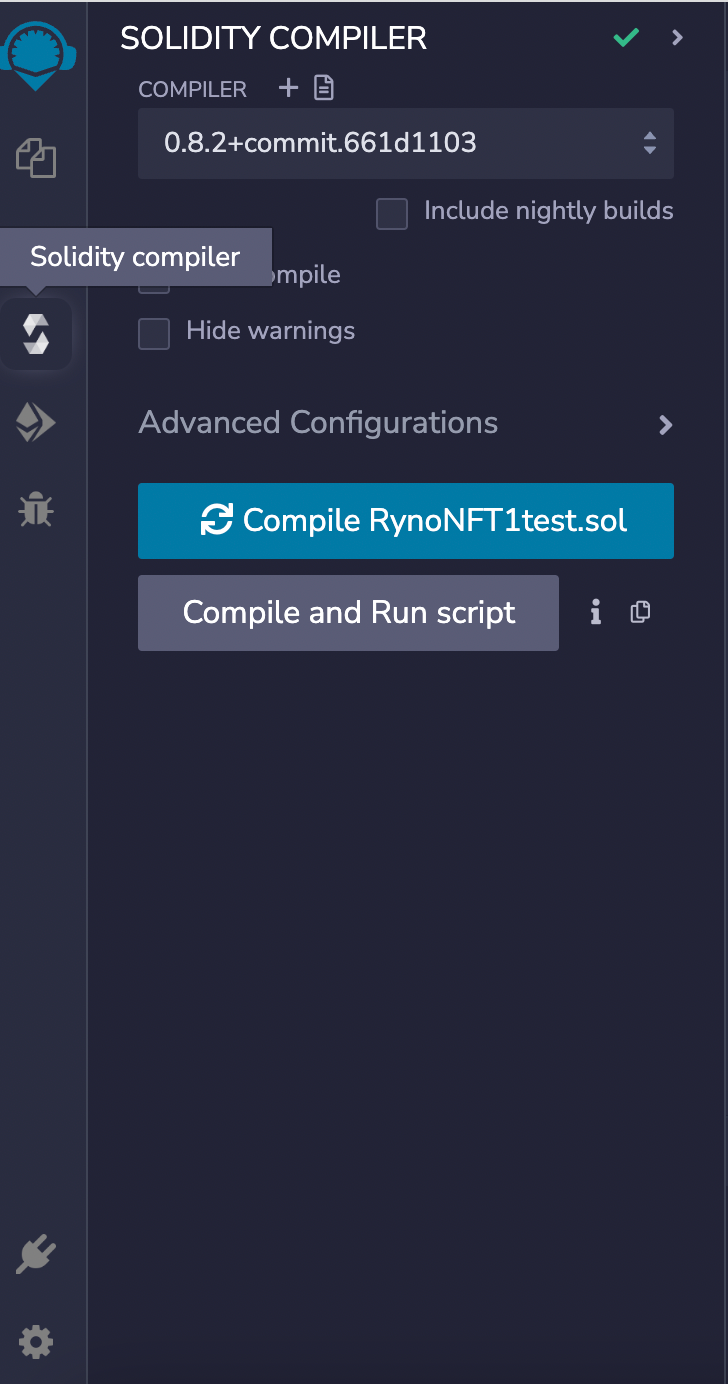
Head on to the Solidity Compiler and make sure your compiler version is either 0.8.0 or higher. Now click on Compile RynoNFT1.sol . Great, now our smart contract is compiled. Let’s connect our metamask Wallet.
Connect Metamask Wallet and Switch to Bitfinity Network
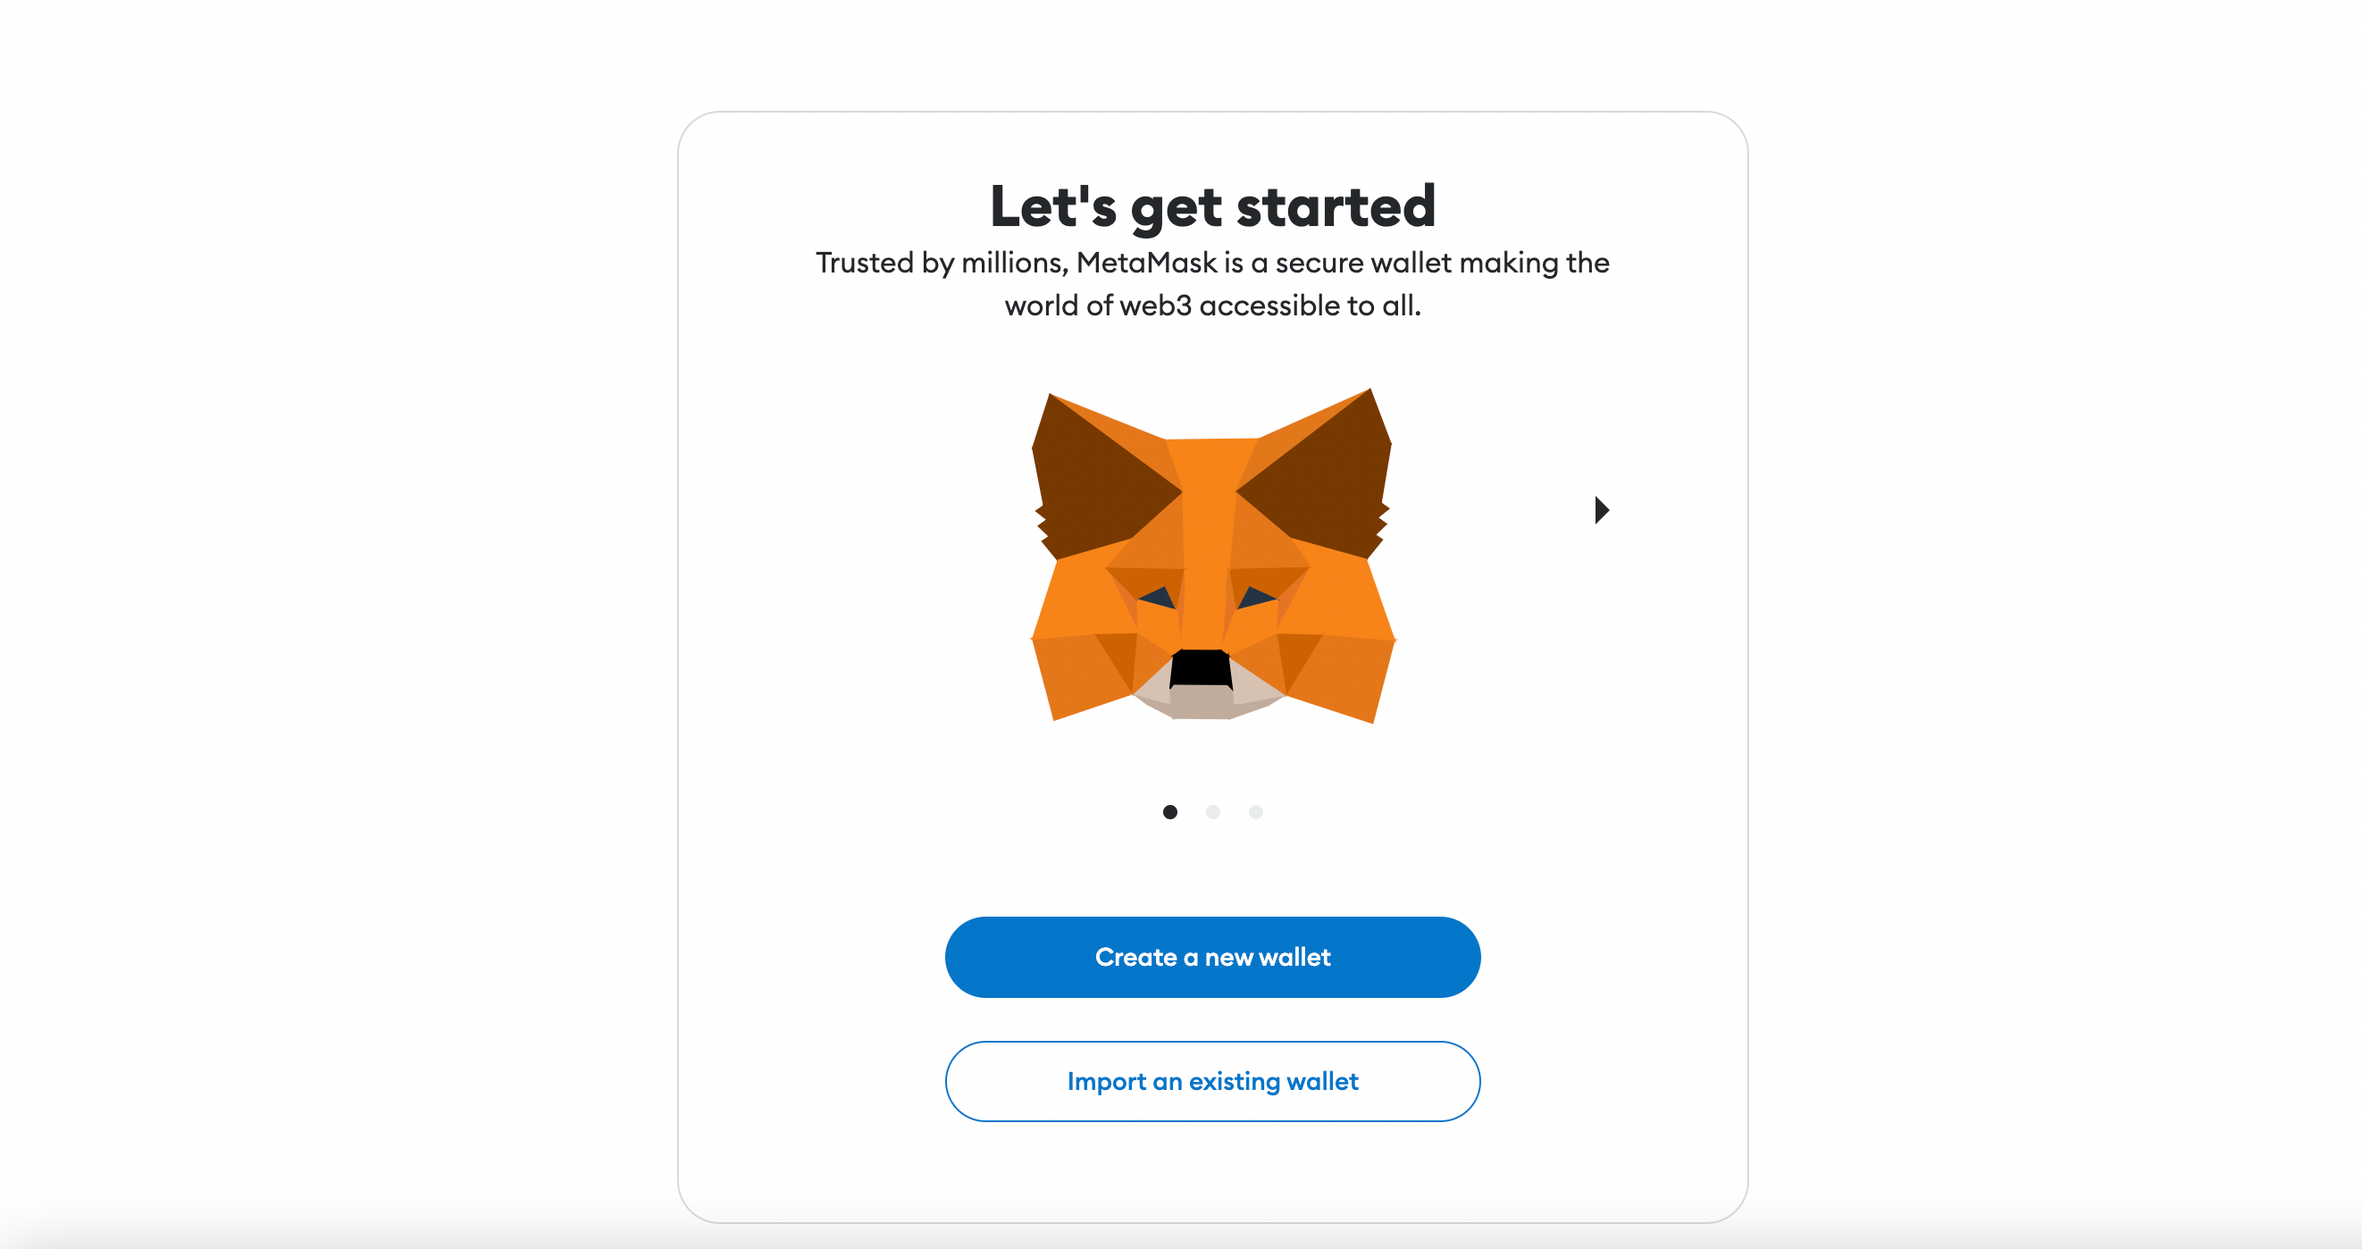
You can download your Metamask wallet here. After installing the Metamask wallet, open wallet and create an account. Skip this step if you already have a Metamask wallet and an account. Let’s switch to the Bitfinity Testnet EVM Network. You can read more about that here. Check out the Bitfinity EVM documentation here https://docs.bitfinity.network/ .
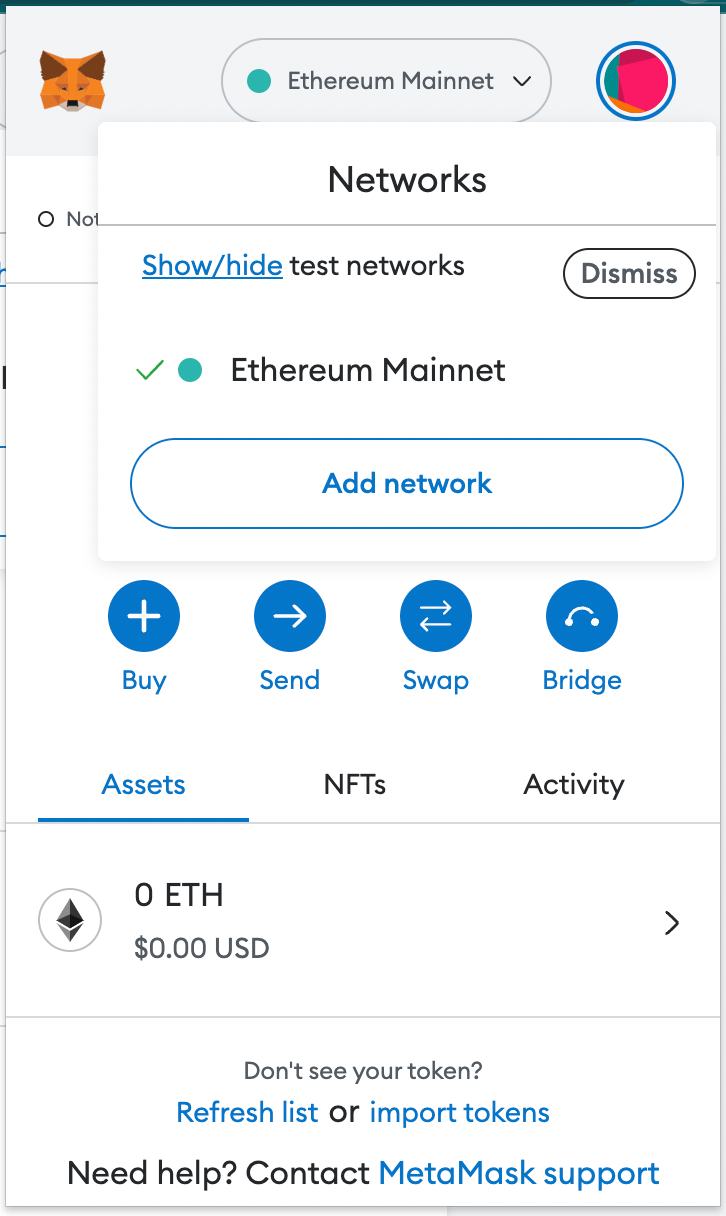
Click on the Network tab to bring up the pop up and click the add network button. Click on add new network and add the bitfinity testnet network.
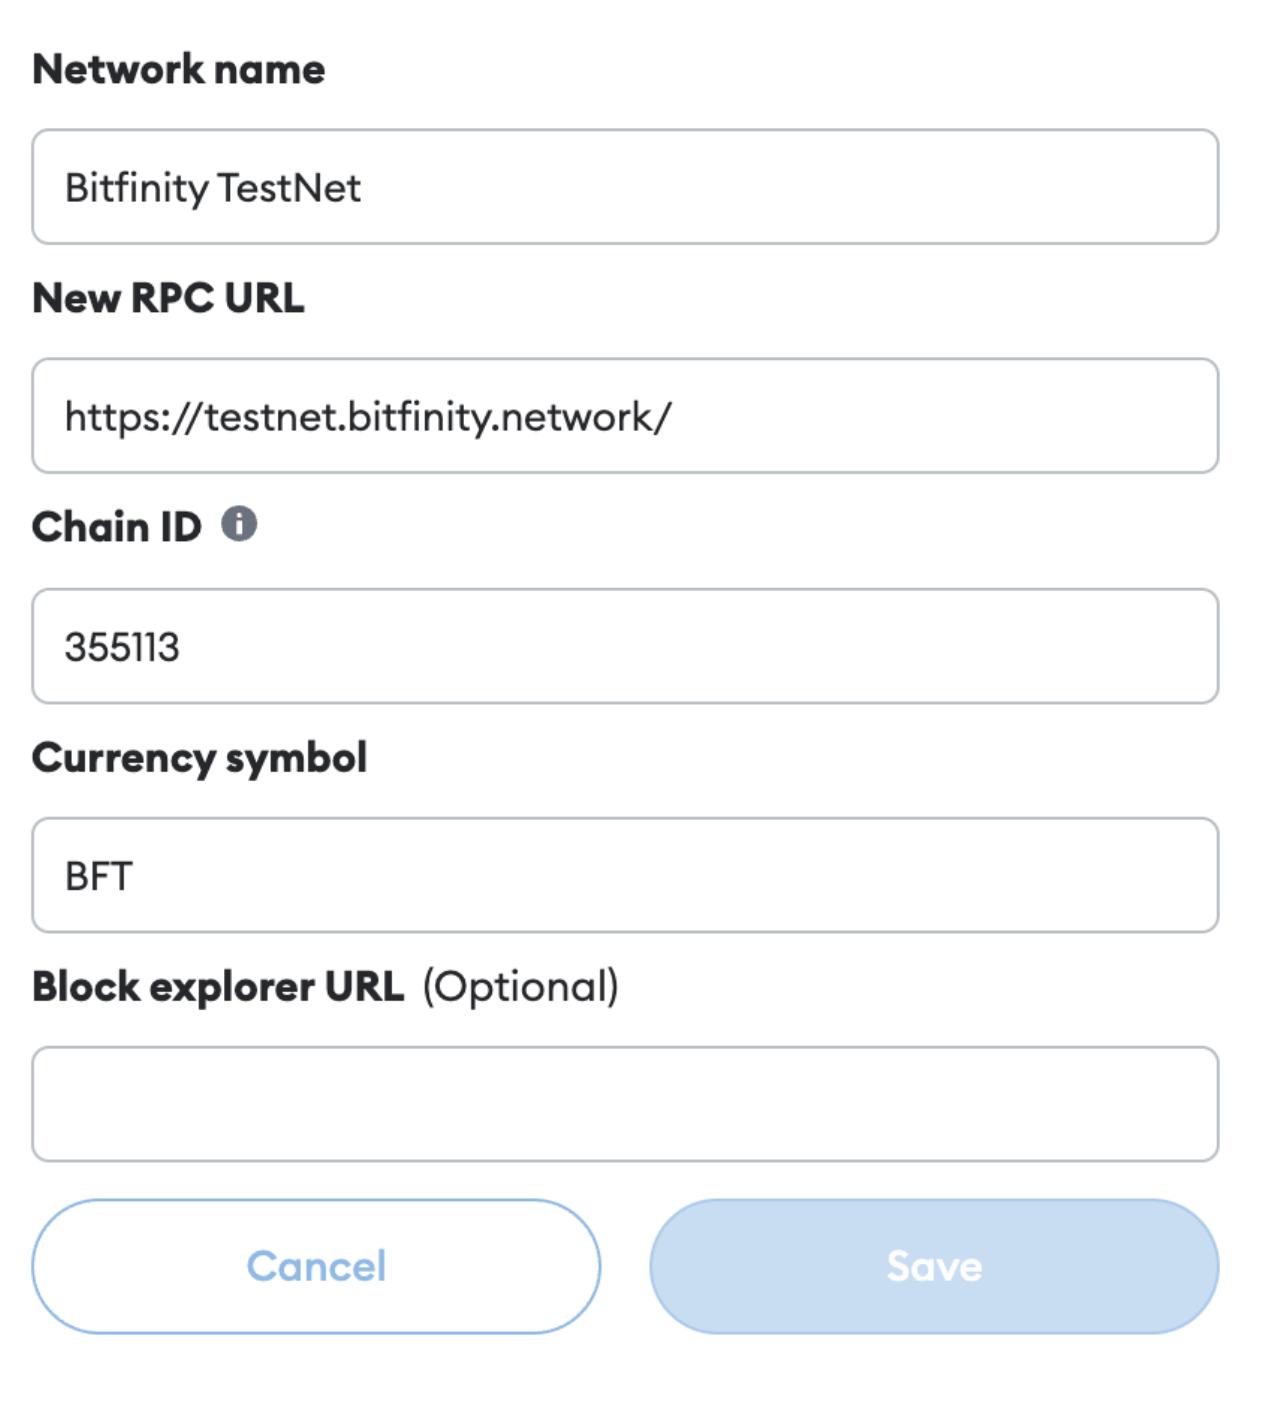
- Network Name: Bitfinity Testnet
- New RPC URL: https://testnet.bitfinity.network
- Chain ID: 355113
- Currency symbol: BFT
- Block explorer URL (Optional): https://explorer.bitfinity.network
Click on save, and you will be prompted to switch to the bitfinity network. Let’s go ahead and do that.
Minting Faucet Tokens
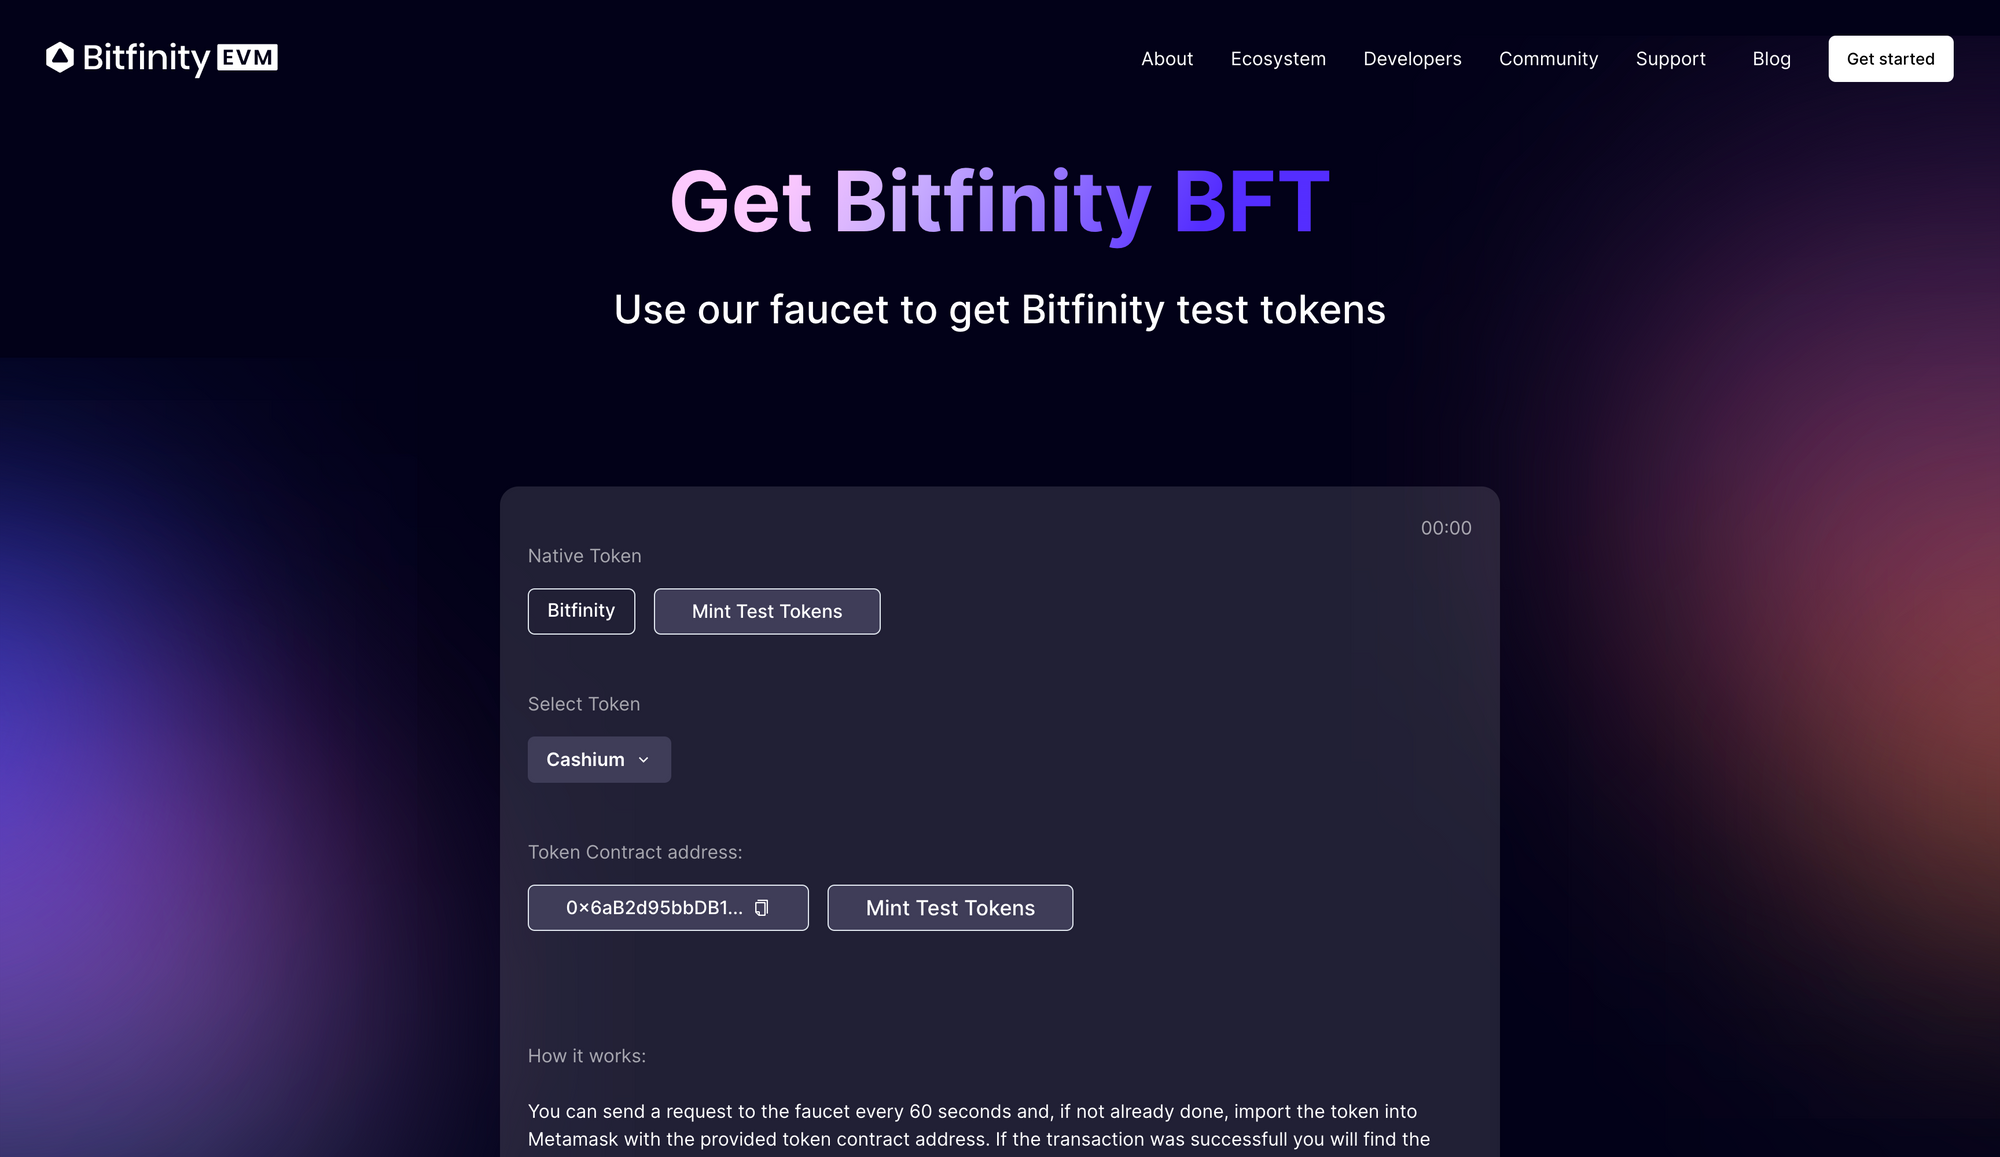
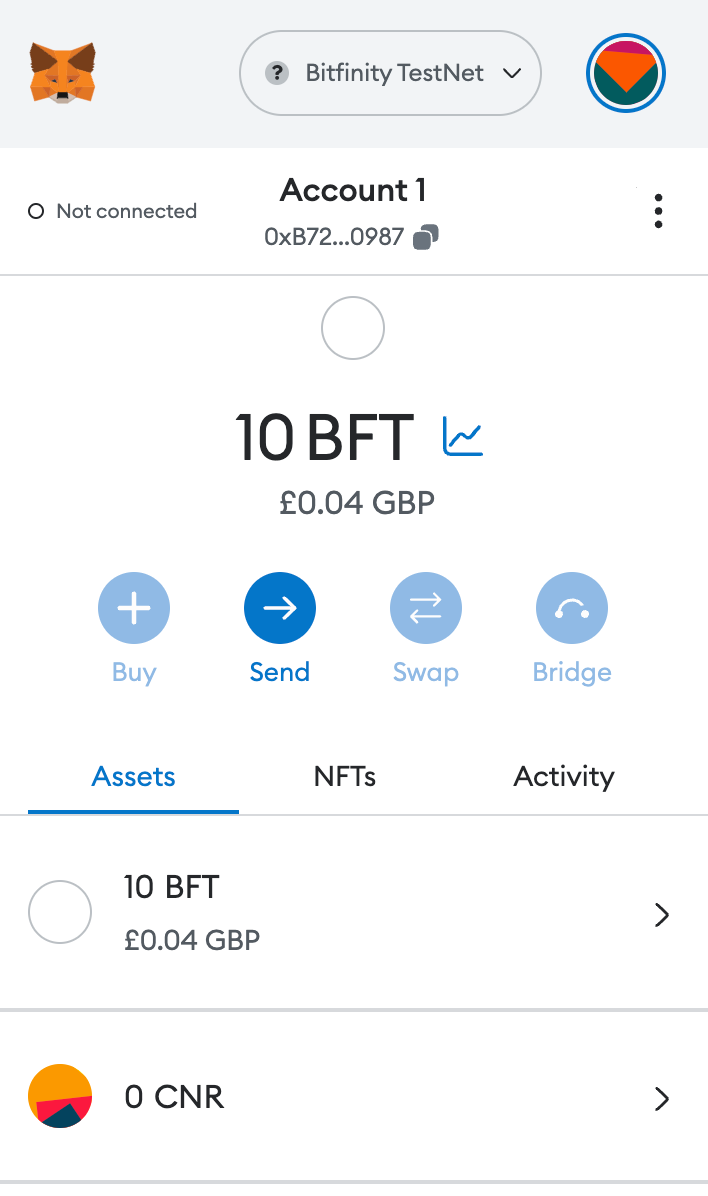
We currently don’t have any BFT so we need to get some. We can get some faucet tokens or test BFT at
https://bitfinity.network/faucet . Click on Mint Test tokens button under Native Token to Mint your BFT. This will initiate a pop up asking you to connect your extension to the site. After click Mint Test Tokens again and you will be award 10 BFT.
Deploying Smart Contract on Bitfinity Network
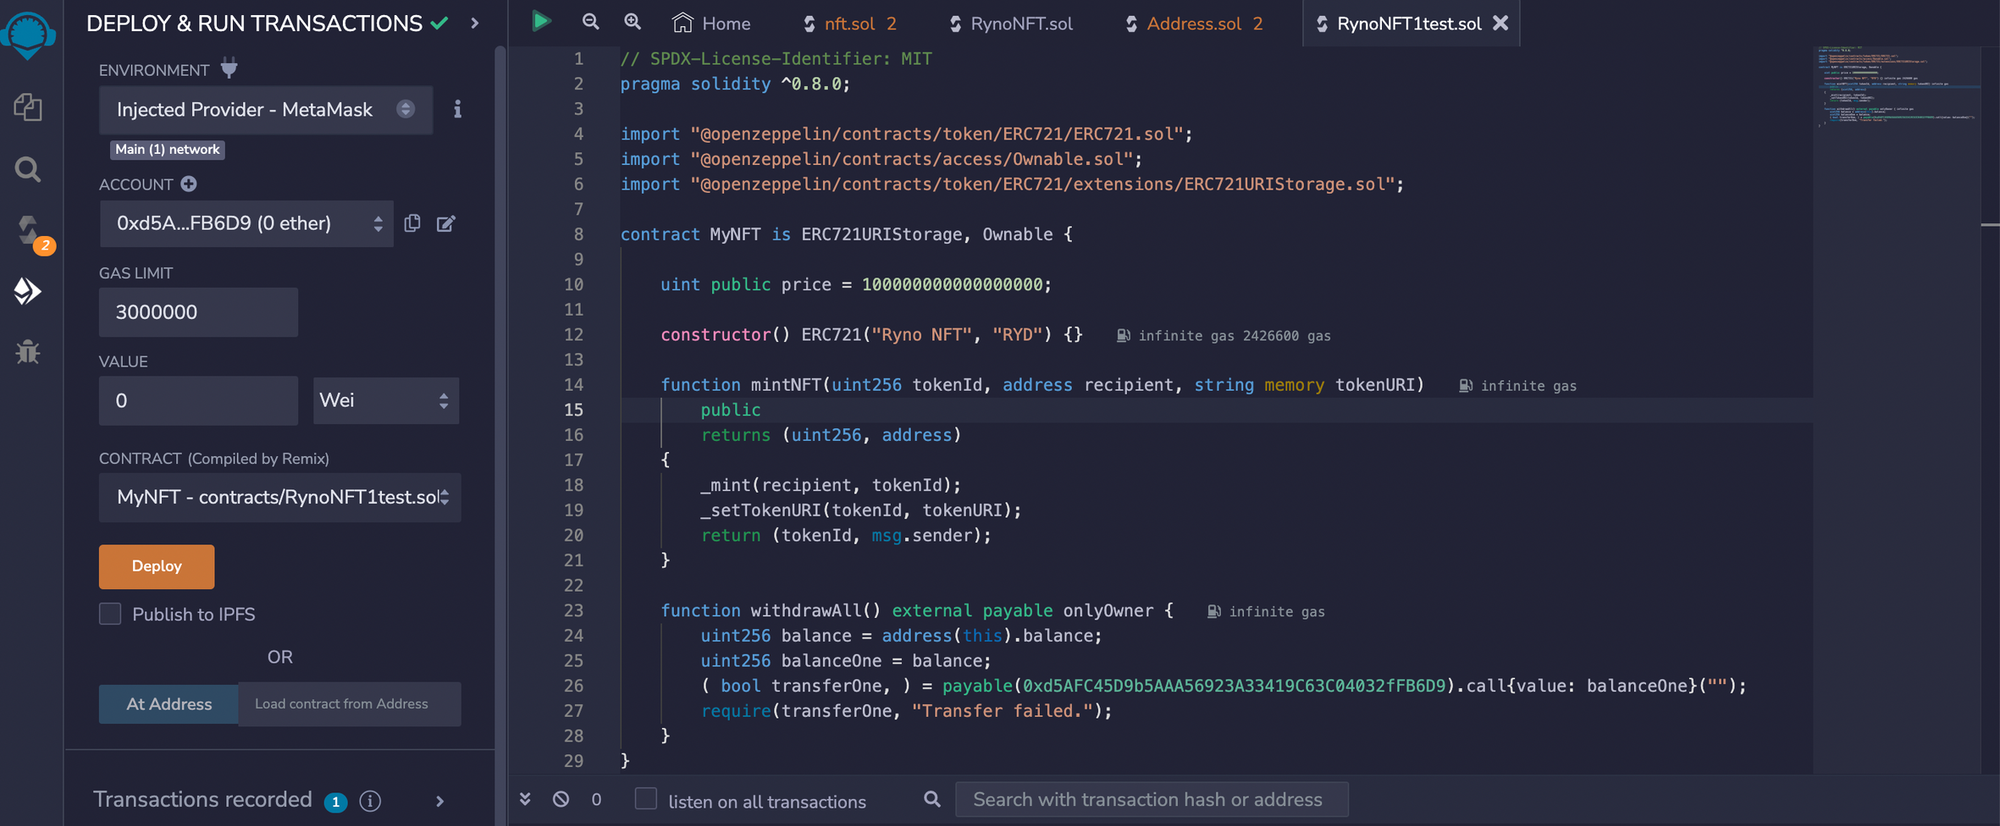
Select Deploy and run transactions on the sidebar and under Environment select Injected Provider - MetaMask. Under Contract, select contracts/RynoNFT1.sol. Name varies on the file name. After you select the Inject Provider - MetaMask , you will need to give consent to connect to remix. now click on deploy and you should have something like this.

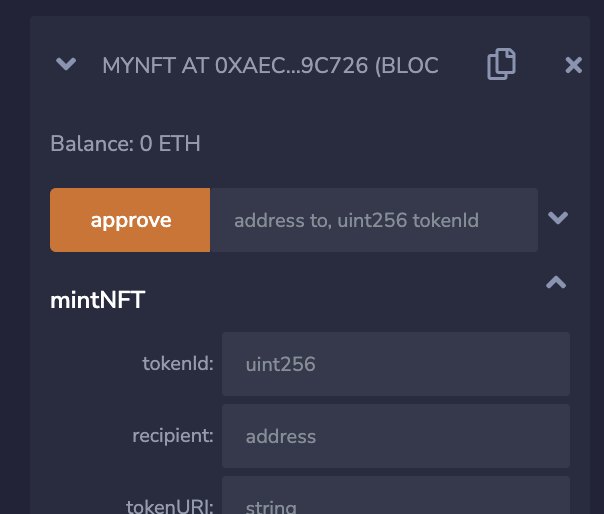
The smart contract has successfully been deployed. After it get’s deployed you will see a tab with the name DEPLOYED CONTRACTS which would hold all your deployed contracts. You can directly make calls to Remix.
Mint NFTs
After you are done deploying the smart contract, you have to copy the contract address. In my example, my contract address was 0xaEc019B04F0EED0A02Ed1353c68D90fE22A9c726.
We would now have to upload our asset's file to a decentralised file hosting service such as IPFS (InterPlanetary File System) in order to create a permanent and publicly accessible record of that asset's existence.
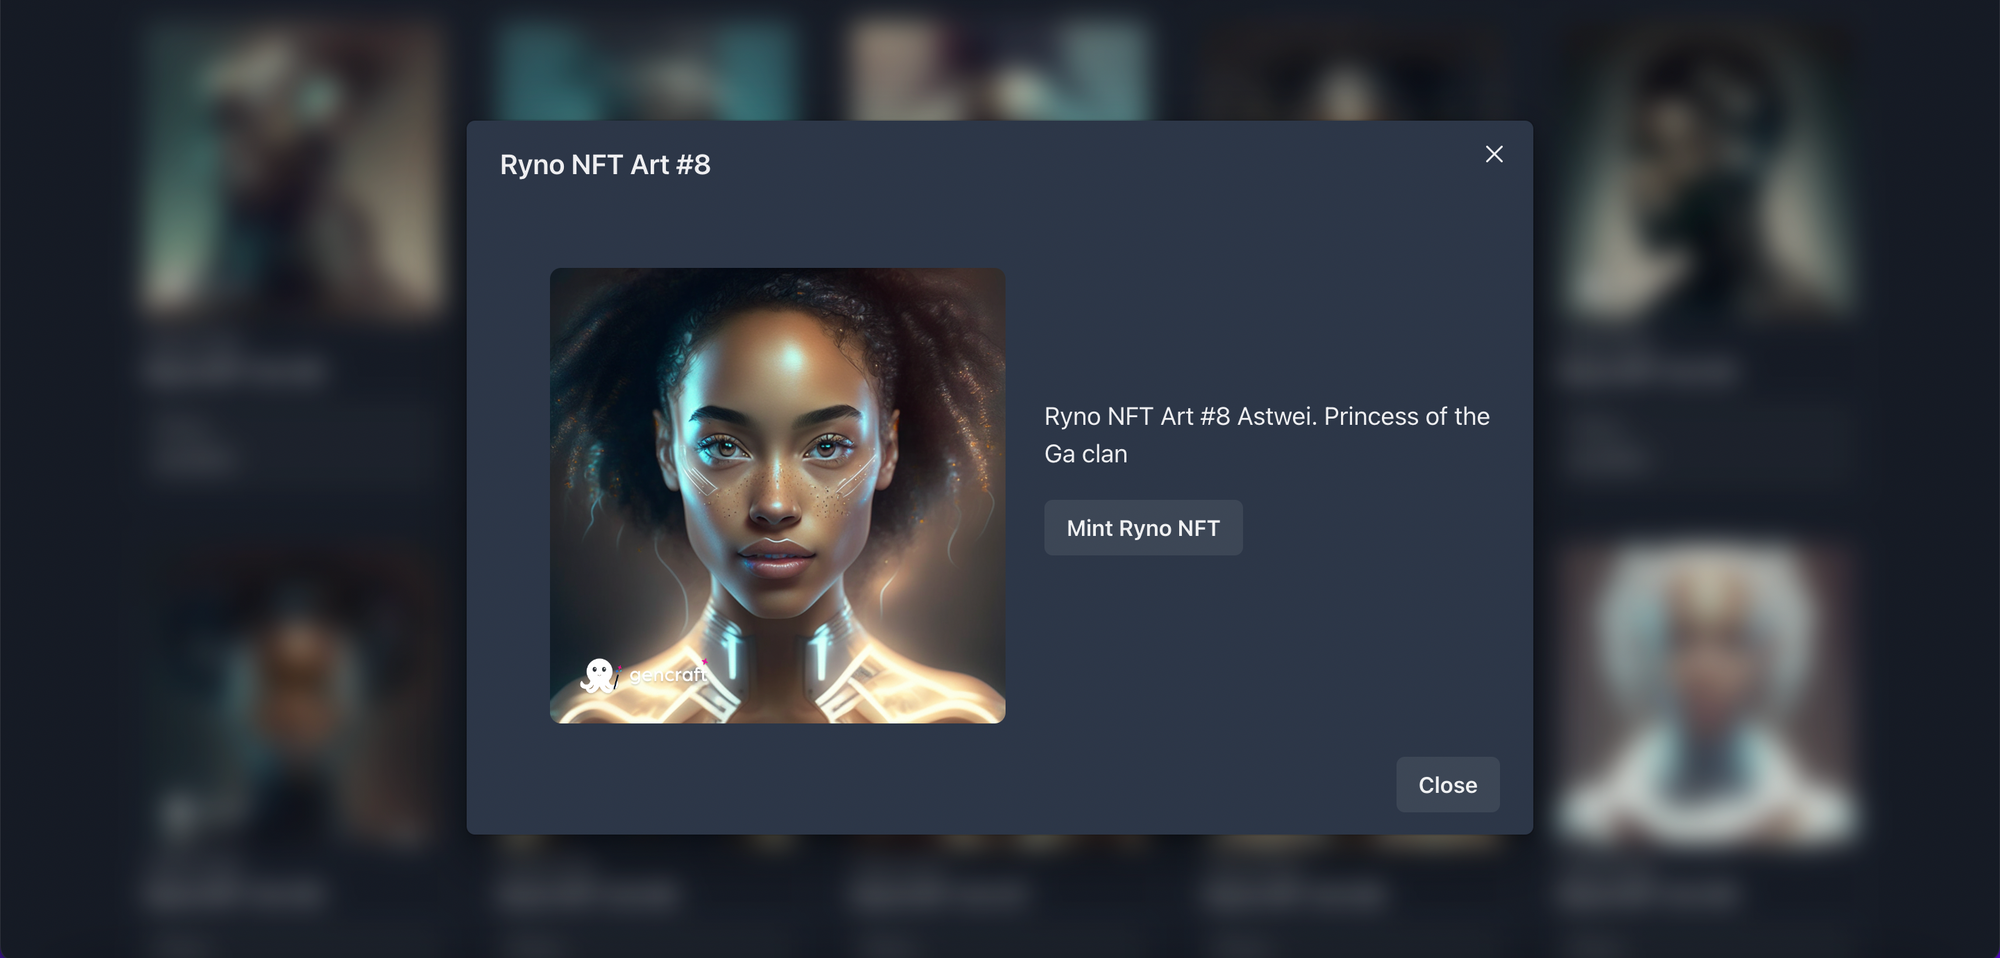
Visit https://nft.storage/ upload your file. Logiin and upload image. It’s very straight forward. You will be presented with something below.

Copy the IPFS URL and create a json file and add this IPFS to the json below like this. So replace the image url in this json with your ipfs url. let’s call this file 0.json. This is going to contain the metadata of the NFT. Upload the json file too then copy the IPFS url of the json file.
{
    "name": "Ryno NFT Art #1",
    "description": "Ryno NFT Art #1 Jubaca. Fierce Warrior of the Ga clan",
    "image": "ipfs://bafybeihfth2vadxya2ph23ox2valfsgsbzhazn5im5uku652l55aiknwoi"
}
We can head back to Remix and then enter the tokenid, receipt address, tokenURI and then click on the transact button to mint the NFT.

https://github.com/infinity-swap/bitfinity-examples-nft-marketplace-interface
You can also skip this and use our example nft-marketplace-interface. All you need to do is clone the project, and read the readme file of how to set up the project. Locate the file utils/constants.ts
and change the contractAddress to your contractAddress you copied.
export const contractAddress = '0xaEc019B04F0EED0A02Ed1353c68D90fE22A9c726'
When you run the template locally, connect your metamask wallet and select the NFT you want to mint. and click on mint. You will get a prompt then your confirm.
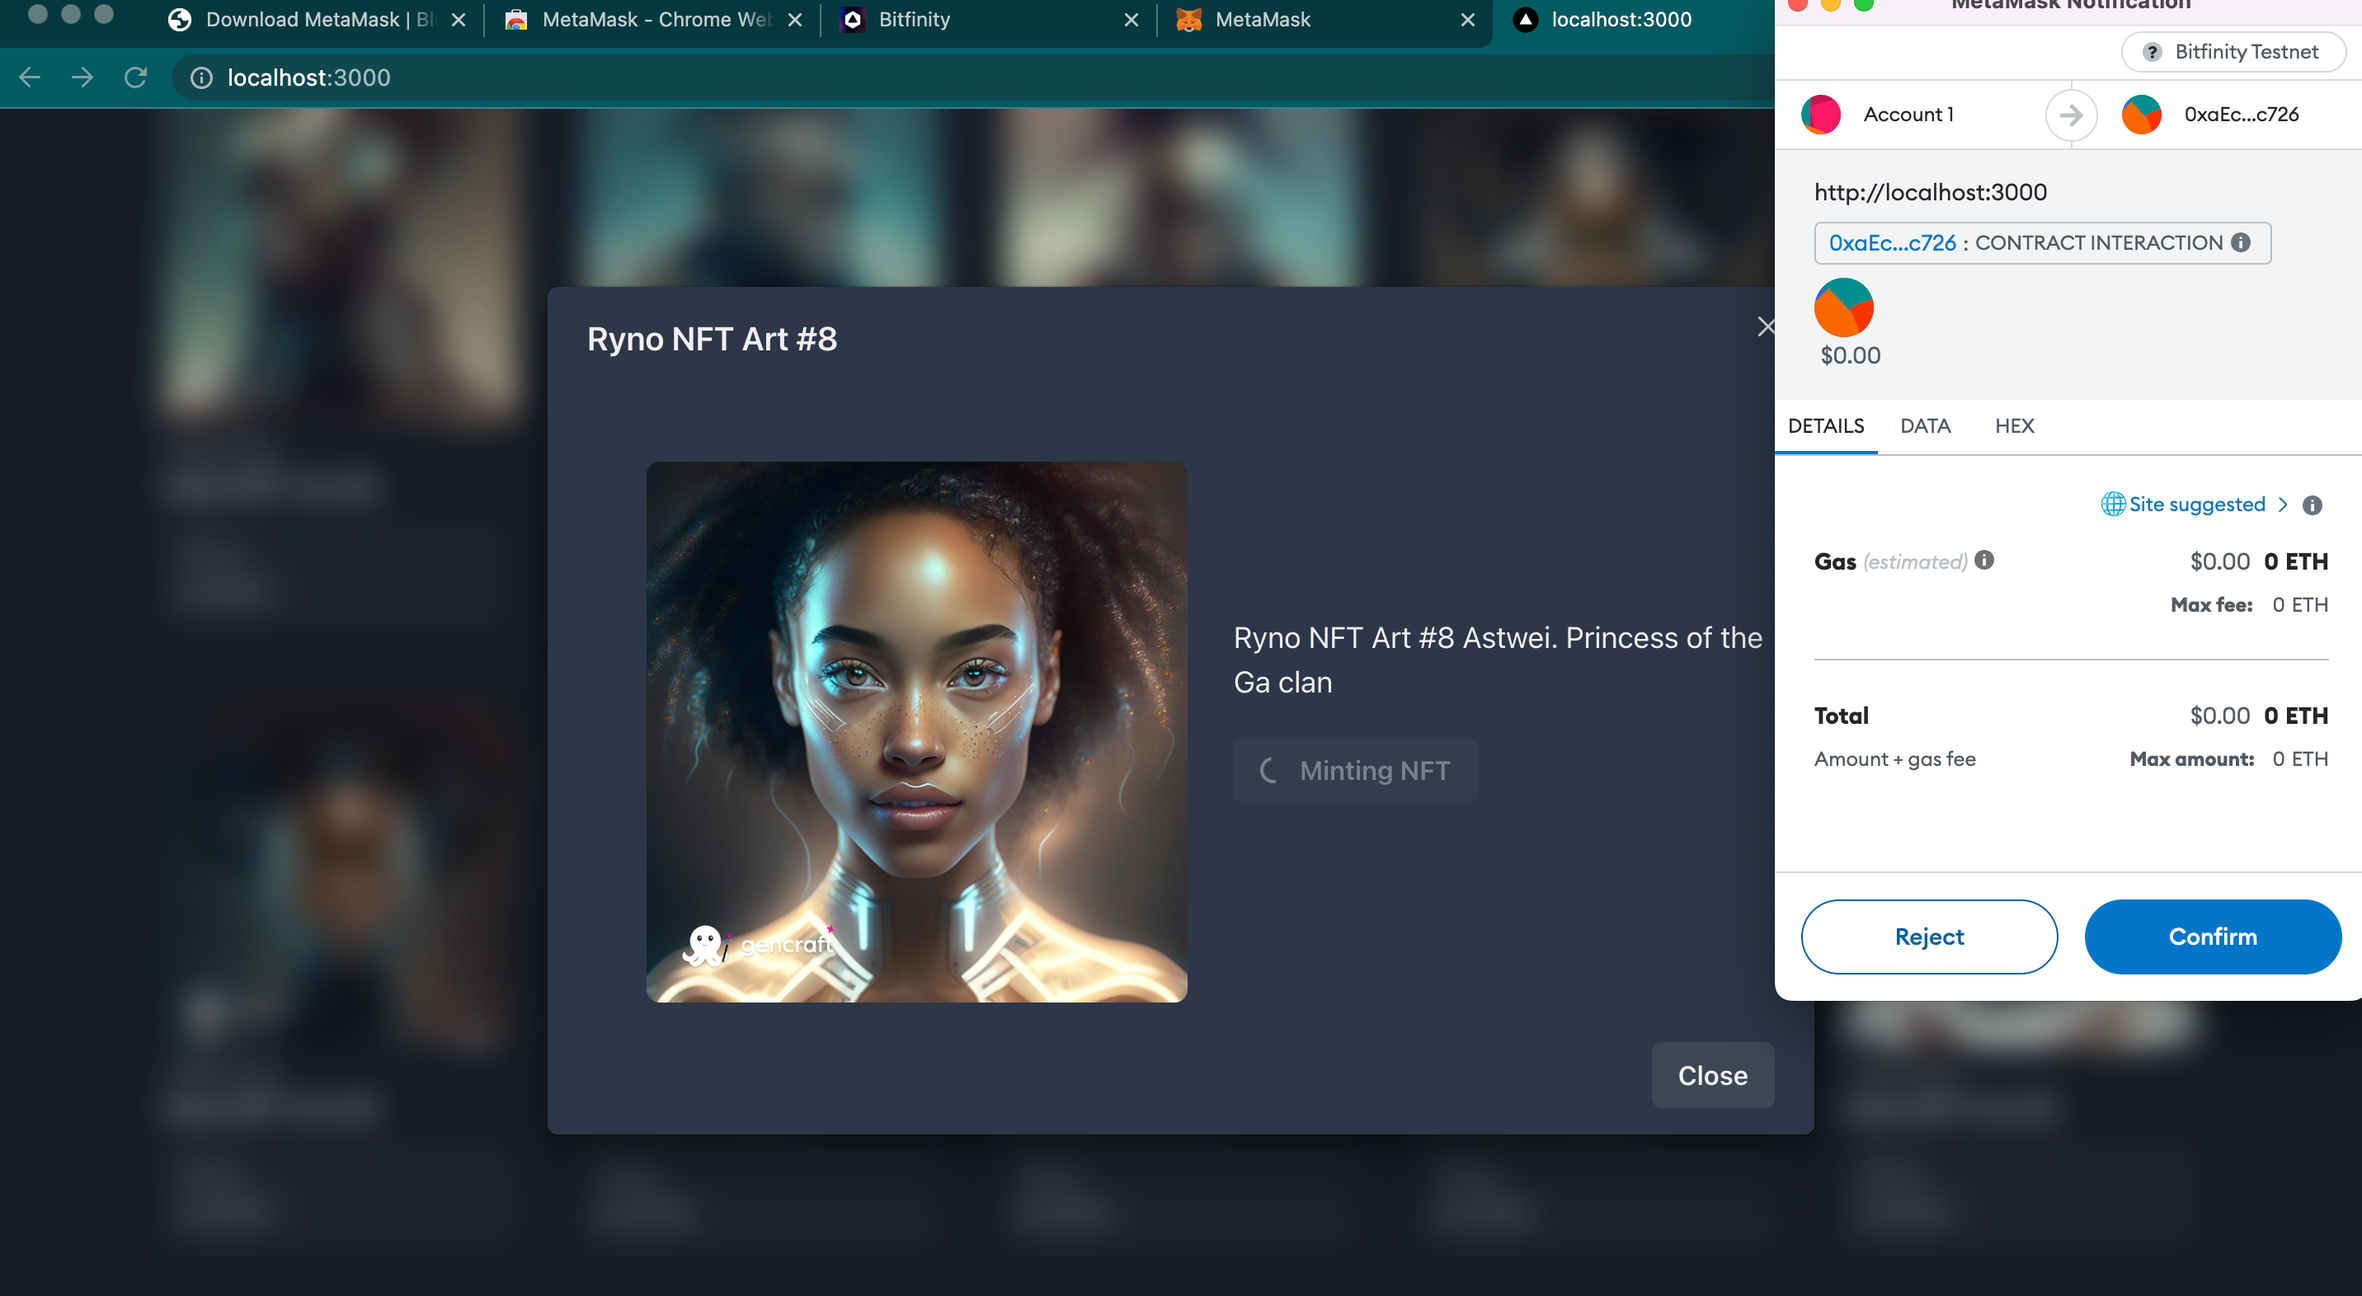
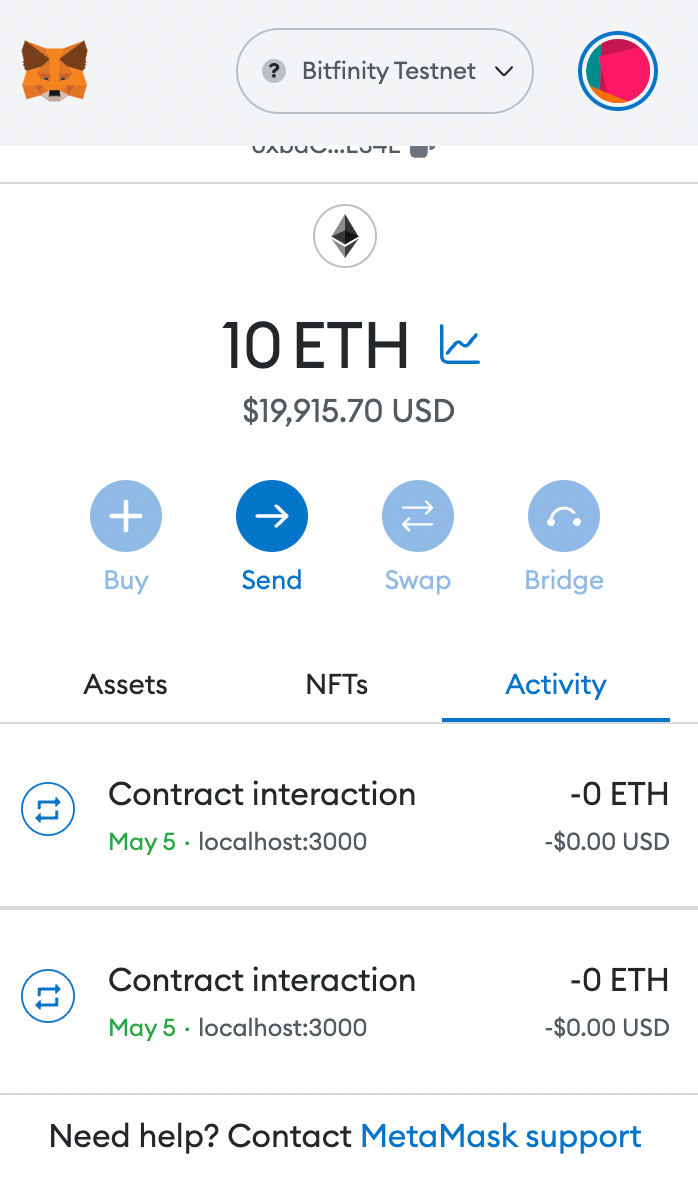
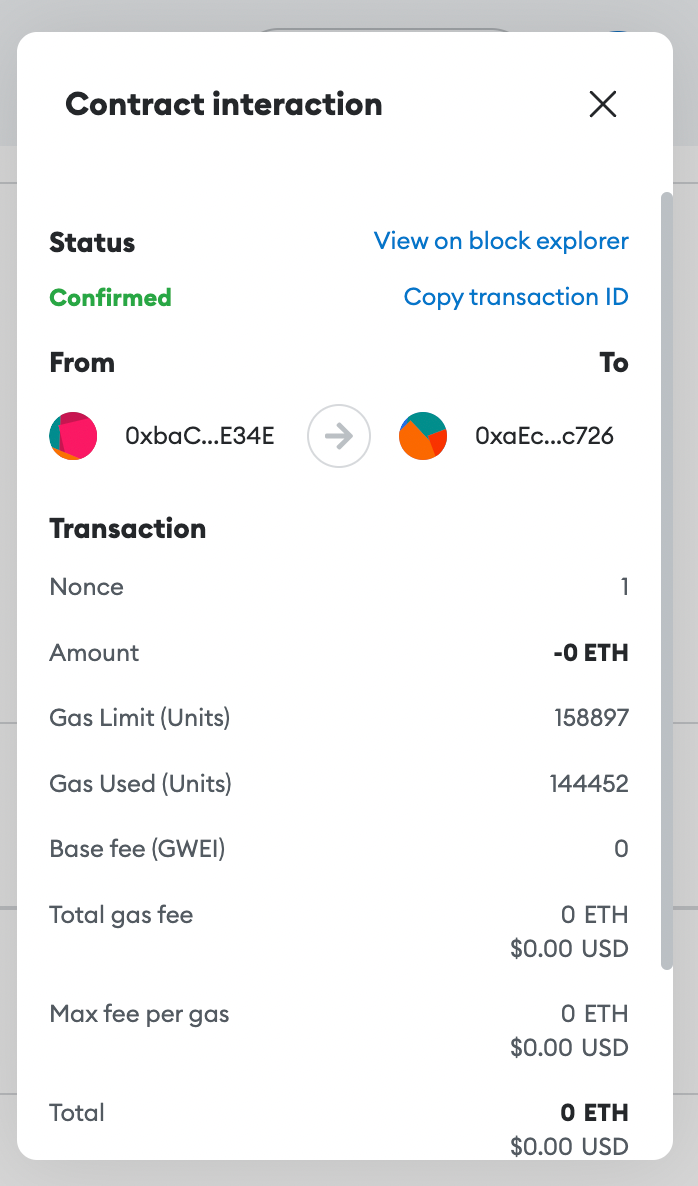
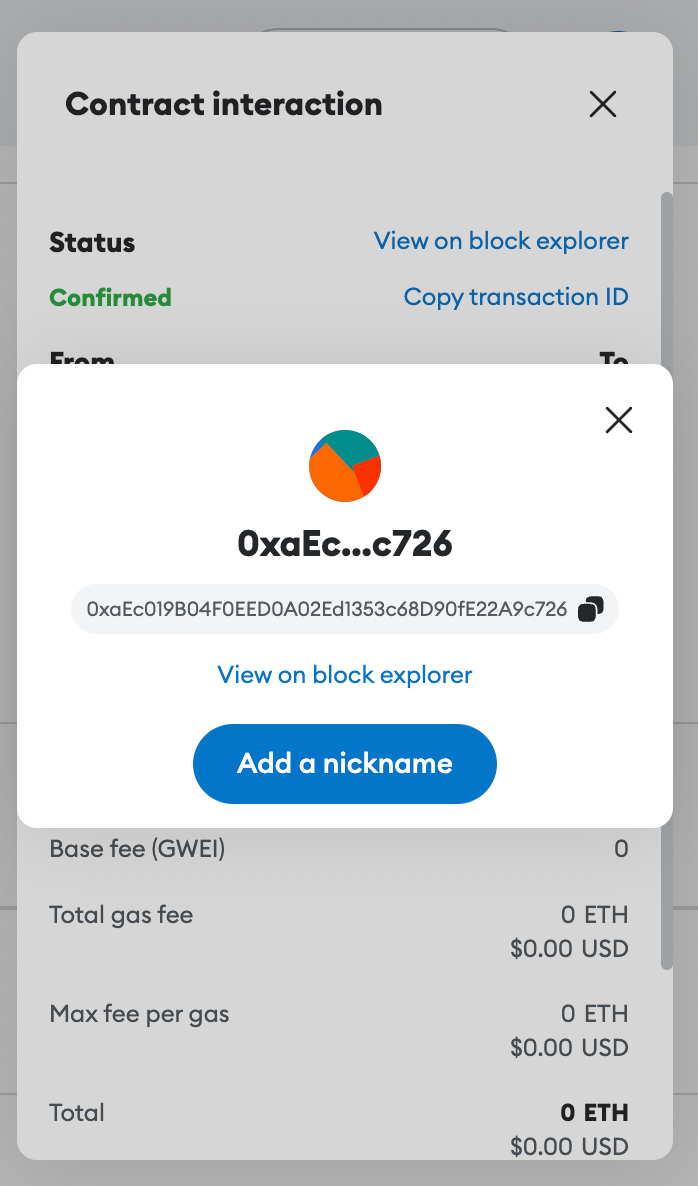
After minting the NFT you will, you will see in the Activity Tab, the Contract Interaction. Select your latest transaction and copy the To Address. That is the address of your NFT collection.
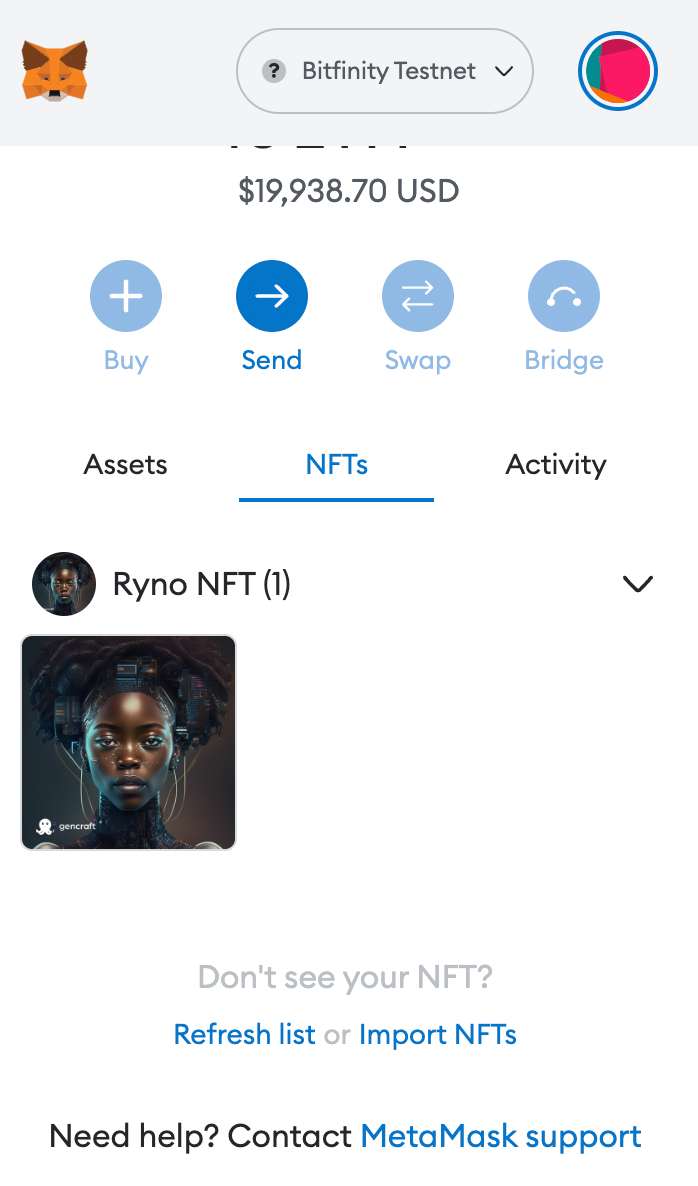
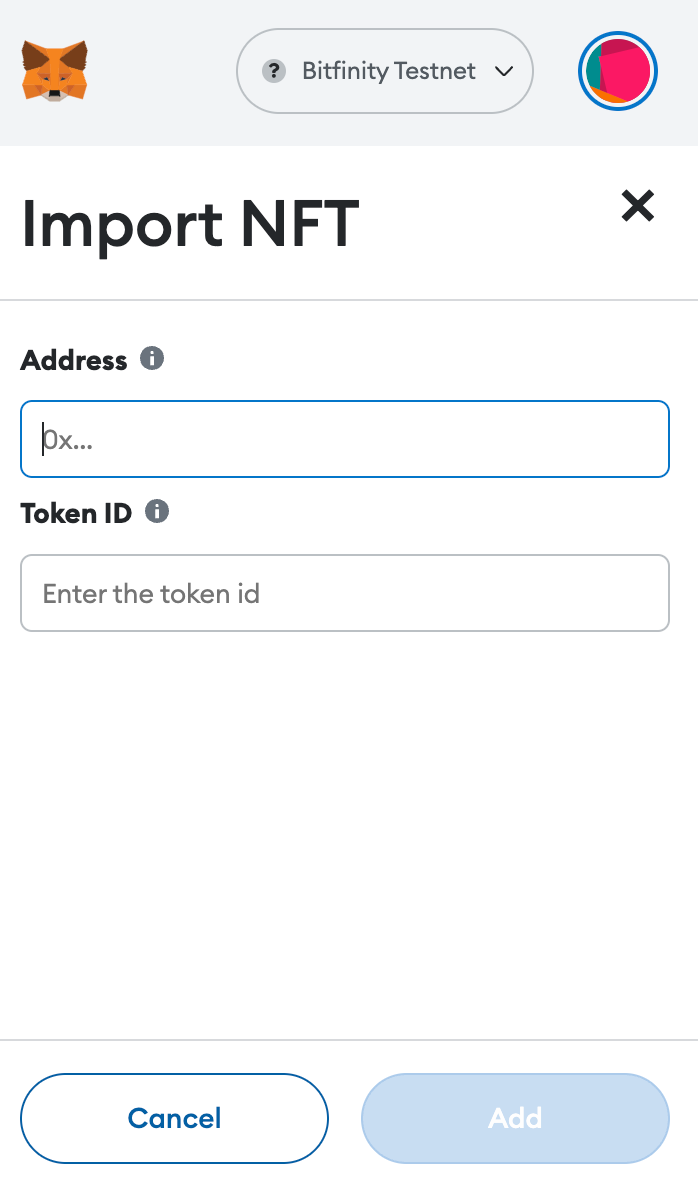
Head over The NFT Tab and click on import NFTs. Paste the NFT collection address and the Token ID of the NFT you minted and click Add.
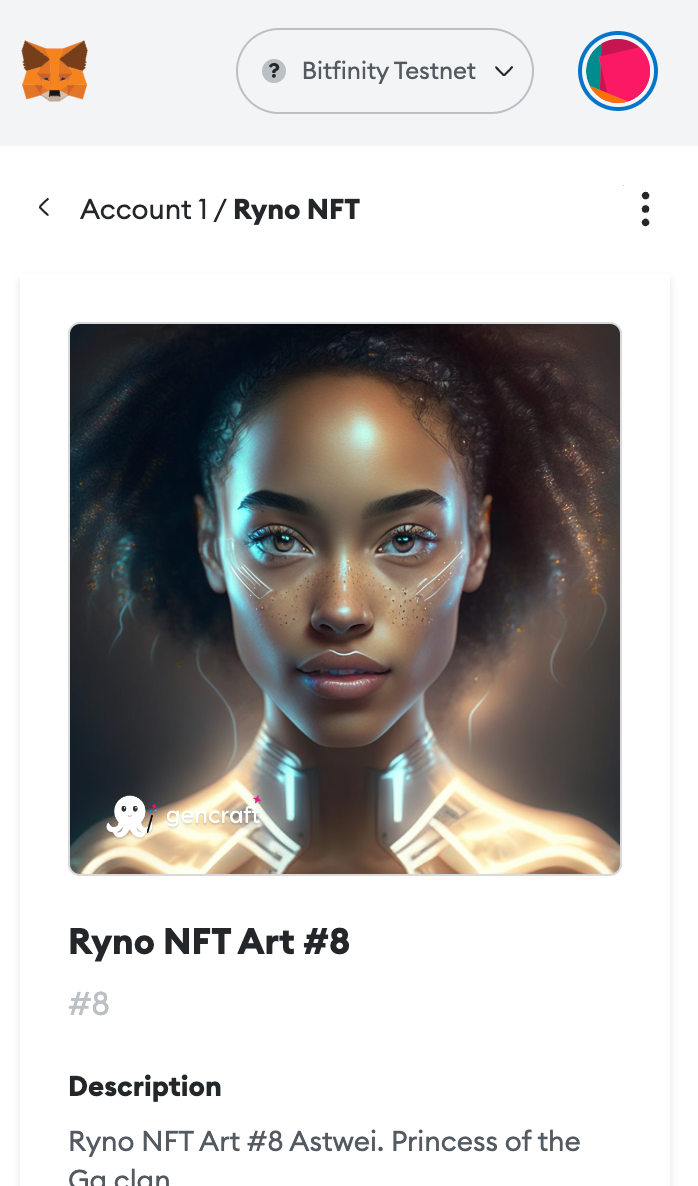
After you add the NFT, you should be able to access it in your Metamask Wallet.


Comments ()