

Staking Your ICP: Everything You Need to Know
This article is a beginner’s guide to walk you through all the necessary steps you’ll need to take to stake your ICP utility tokens and any other information you'll need surrounding ICP staking.
Staking your ICP to earn a passive reward is a sustainable way of generating income on your crypto holdings. In addition, it lets you have a say in the governance of the Internet computer ecosystem.
This article is a beginner’s guide to walk you through all the necessary steps you’ll need to take to stake your ICP utility tokens and any other information you'll need surrounding ICP staking.
Stage 1: Own some ICP assets
Step 1: To own some ICP tokens in your digital wallet, you simply have to buy them from any of the various exchanges that have ICP listed on their platforms.
Here’s a list of popular exchanges you can buy ICP tokens from.
· Binance
· Coinbase
· OKX
· Kucoin
· Kraken
· Gate.io
· Huobi Global
· Bitfinex
· DigiFinex
· BitMart
· CoinList
· WazirX
· BKEX
· CoinEx
· Bilaxy
· BiKi
· ZB
· Bitladon
· Hotbit
· HitBTC
· XT.COM
· LocalTrade
· Latoken
· WhiteBIt
Once you’ve purchased ICP tokens from any of the exchanges, you’re set for the next stage of staking your ICP.
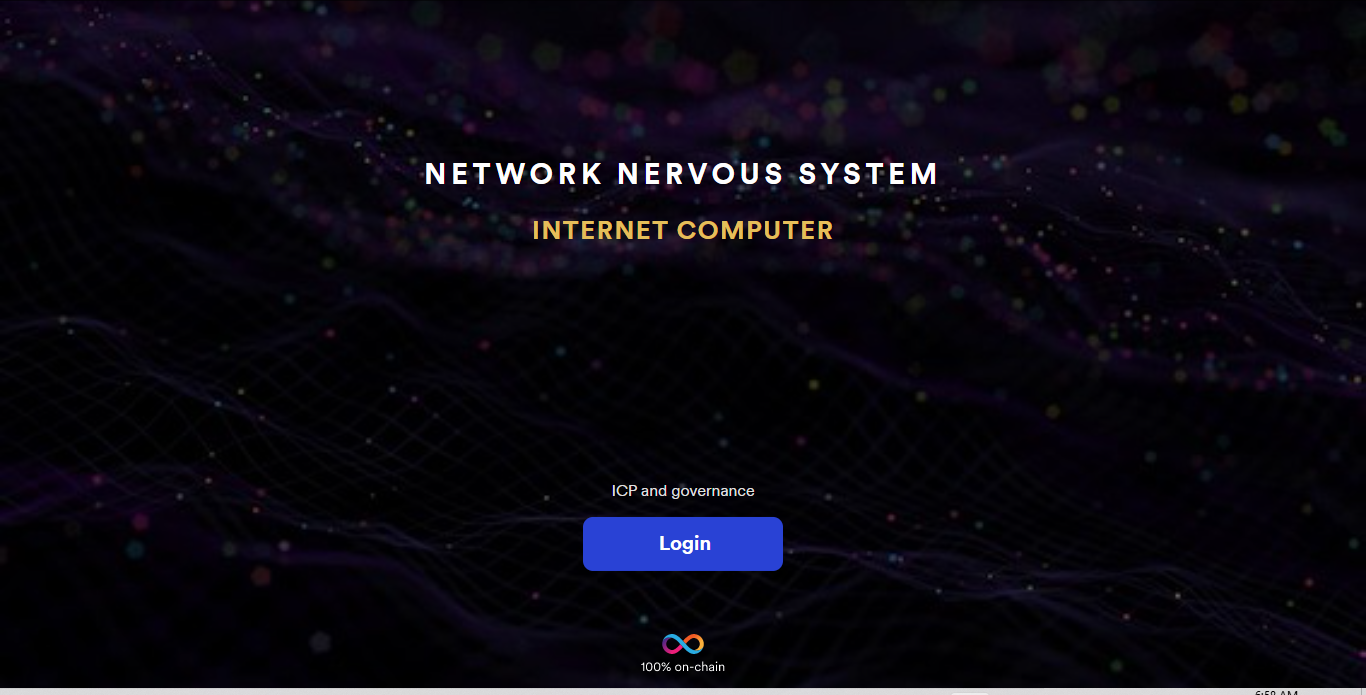
Stage 2: Set Up your Internet Identity
Just before transferring your tokens, you’ll need to first prepare the ground for it. Begin by setting up an internet identity for your device via the Network Nervous System (NNS) dapp. Your internet identity is the nomenclature that identifies you within the NNS.
What is Network Nervous System (NNS)?
The NNS is the brain that manages and governs all the functions and activities within the Internet Computer, including the staking mechanism.
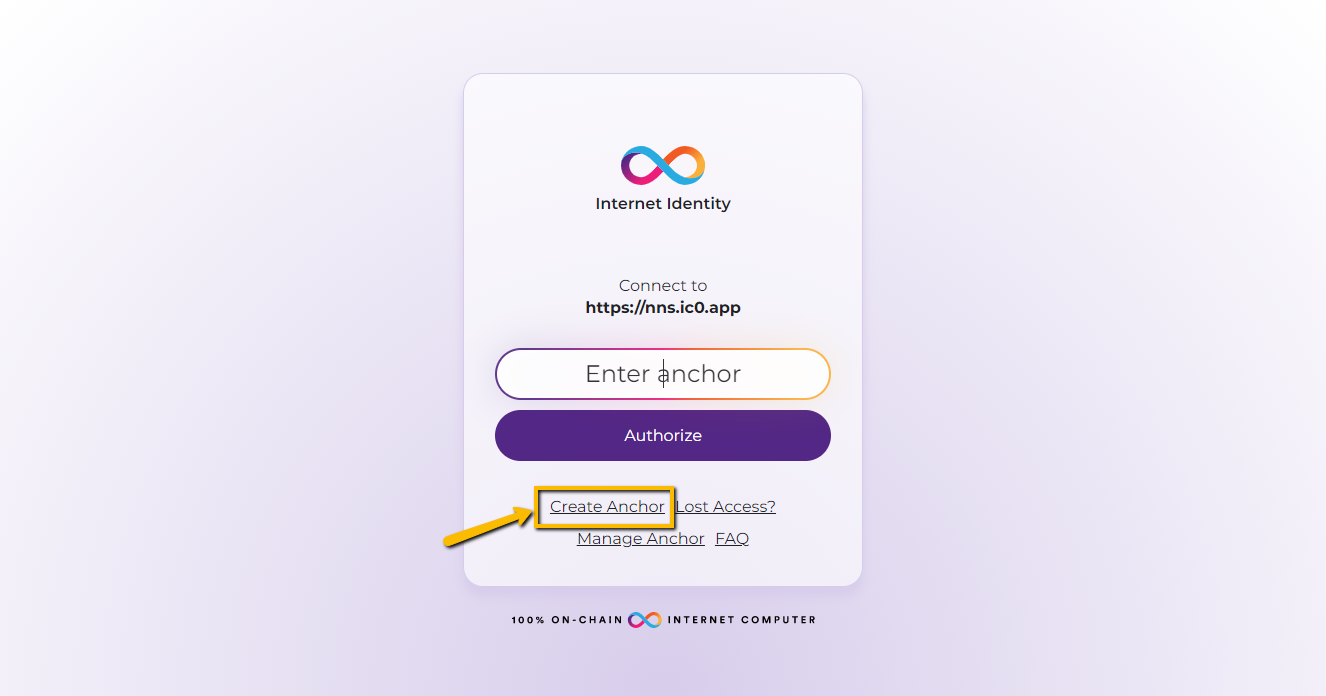
Step 2: Go to https://nns.ic0.app to create your internet identity.
Step 3: Click ‘Login' and then select ‘Create Anchor.’
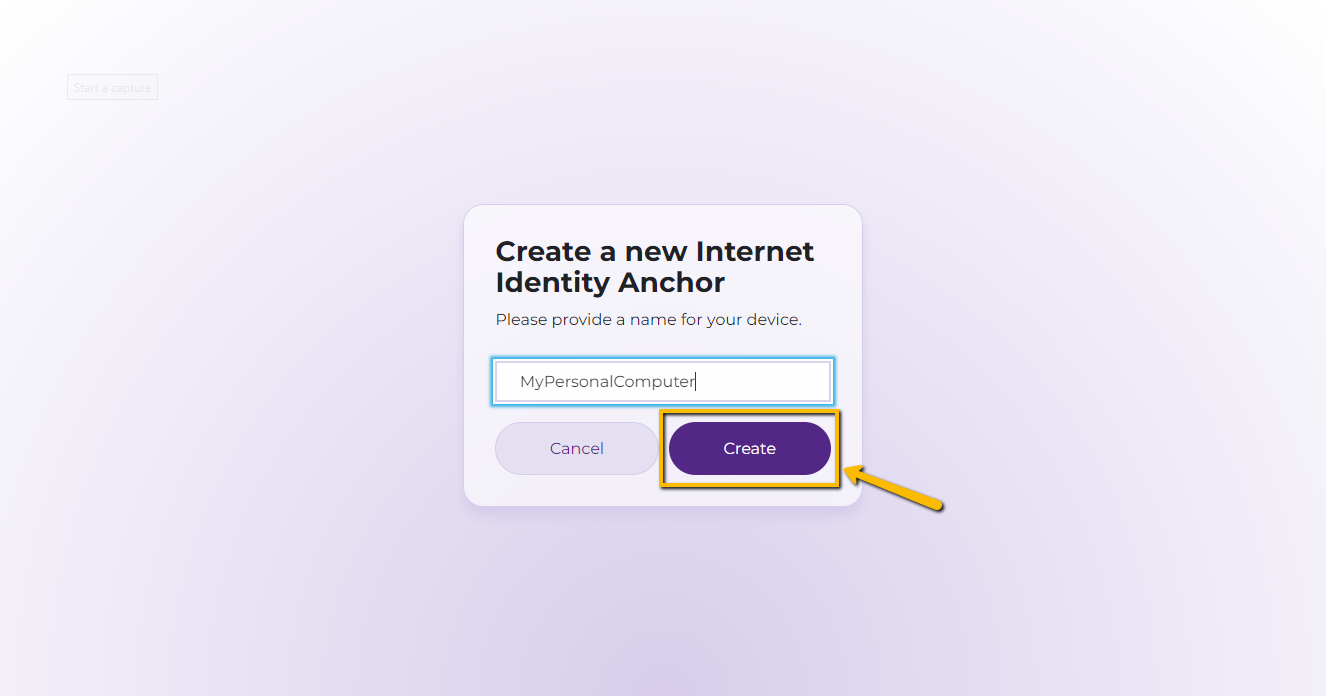
Step 4: Enter a name to represent your Internet Identity (II) anchor. For example, ‘MyPersonalComputer’ as seen in the screenshot below, and then click ‘Create to continue.
Step 5: Next, verify your device identity by choosing from one of the options.
Note: Your options to verify may vary, primarily due to how your device authentication is configured. The ‘External security key or built-in sensor’ option worked just fine for this demonstration.

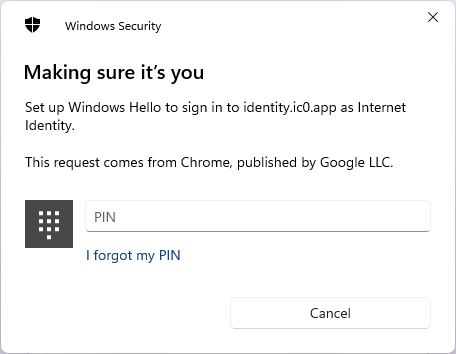
Step 6: Enter your Windows Hello computer security pin to continue. Check this guide for more information on how to set up your Windows Hello.
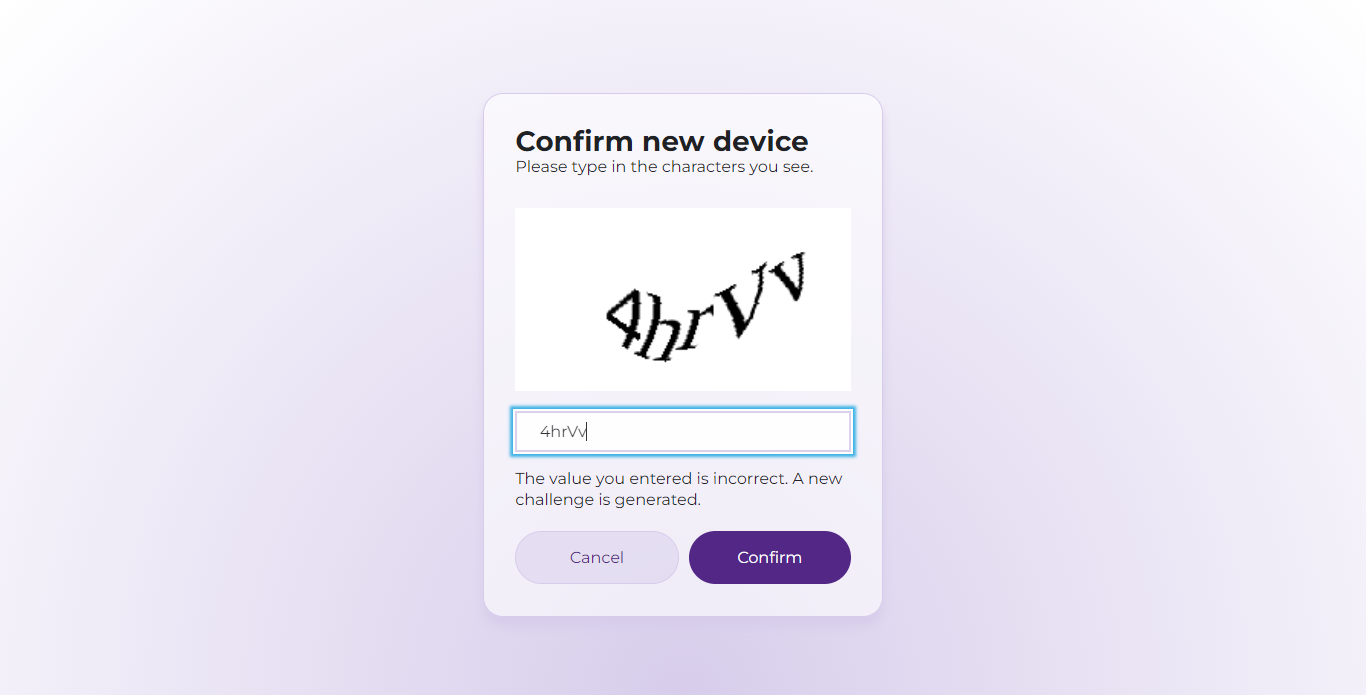
Step 7: After imputing the correct PIN, proceed to solve a Captcha and then confirm.
Note: Captcha is case-sensitive.
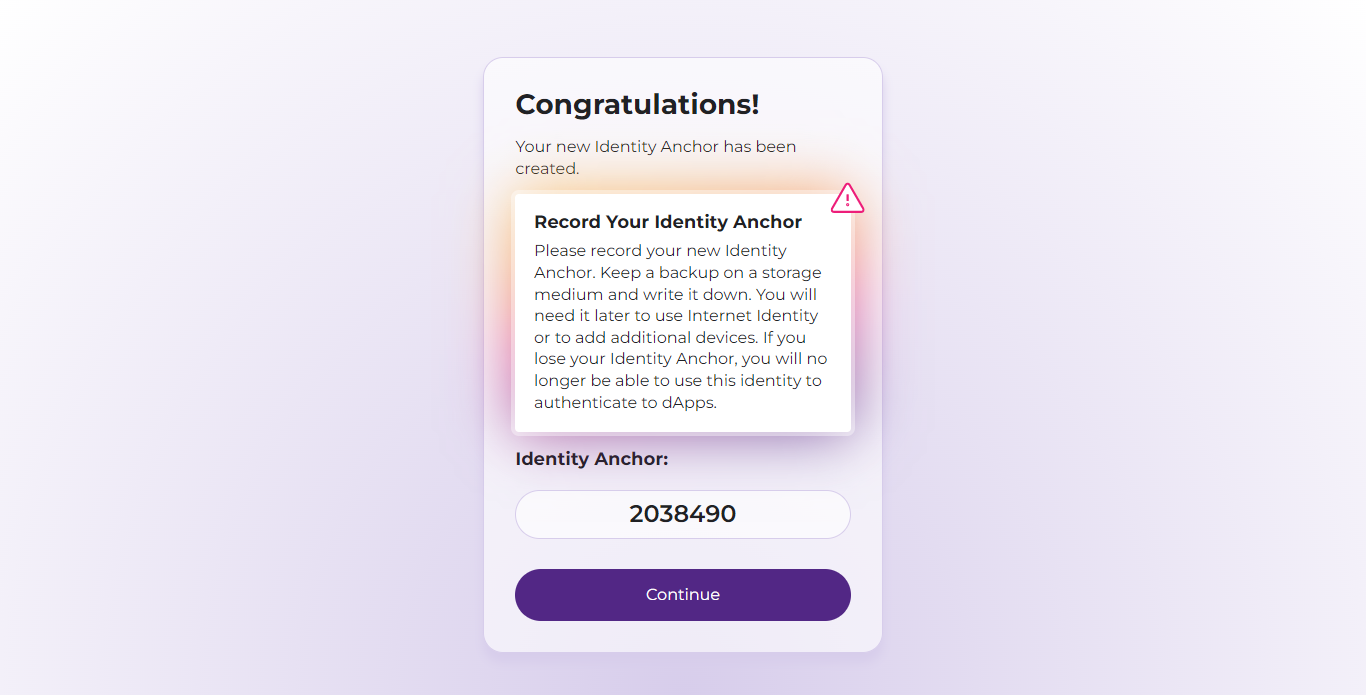
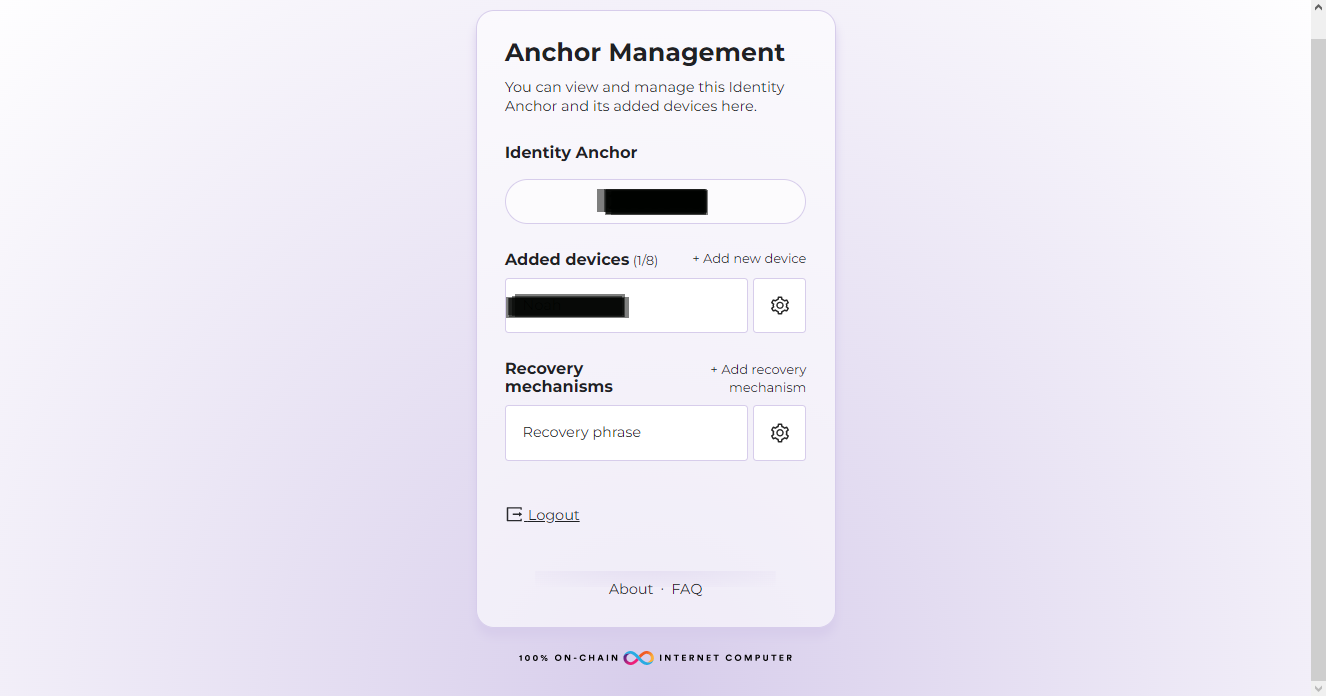
Step 8: The system will assign you a 7-digit personal identity anchor. ensure that you keep a record of your identity anchor.
Note: The identity anchor will be helpful whenever you want to log in to your account next time. Ensure to read the instructions that appear on the screen.
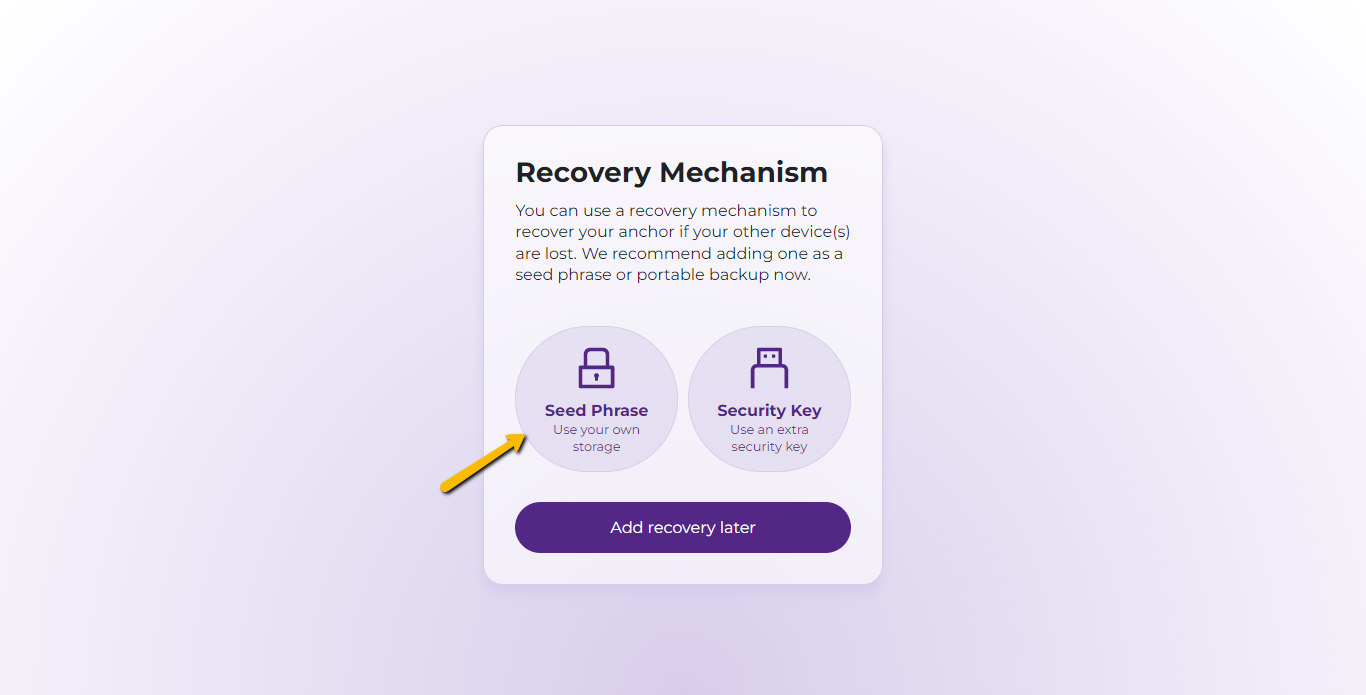
Step 9: Next, choose a Recovery Mechanism. Select the Seed Phrase option to reveal a series of words generated specifically for your account.
Step 10: Write down your seed phrase in the order they appear, or copy and print them out on paper. Next, tick the ‘I have stored my seed phrase’ box and continue.
Warning: Do not reveal your seed phrase to anyone. You can lose all your assets if someone else knows your seed phrase.

The screen below indicates that you’ve completed setting up your internet identity.
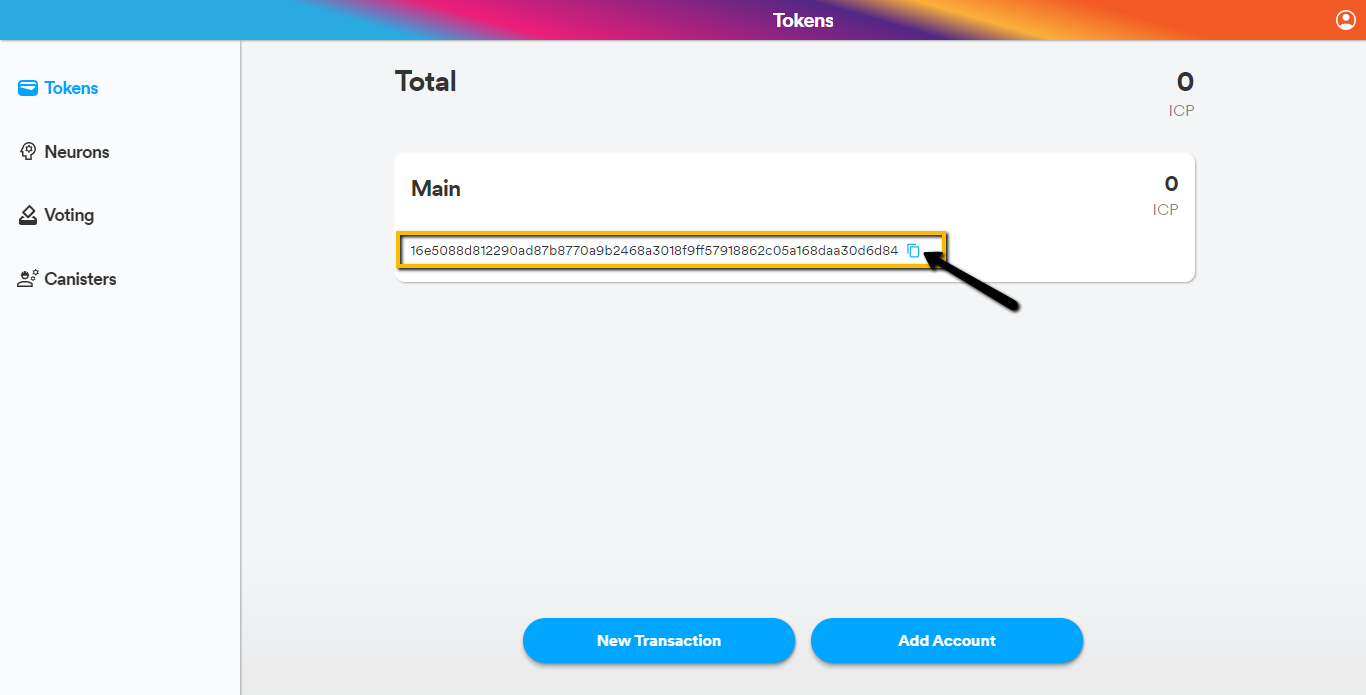
The NNS desktop frontend dapp will auto-save on your PC homepage. Launch the dapp and input your login details. It will appear like it is in the screenshot:

Stage 3: Transferring your ICP from exchange to the newly created NNS dapp
Step 11: Copy the ICP address, paste it into the withdraw section of the exchange where you initially bought ICP, and complete the transfer of your ICP tokens from there.
Once you’ve received your ICP into the NNS wallet, you’re now ready to stake them.
Stage 4: Staking your ICP tokens
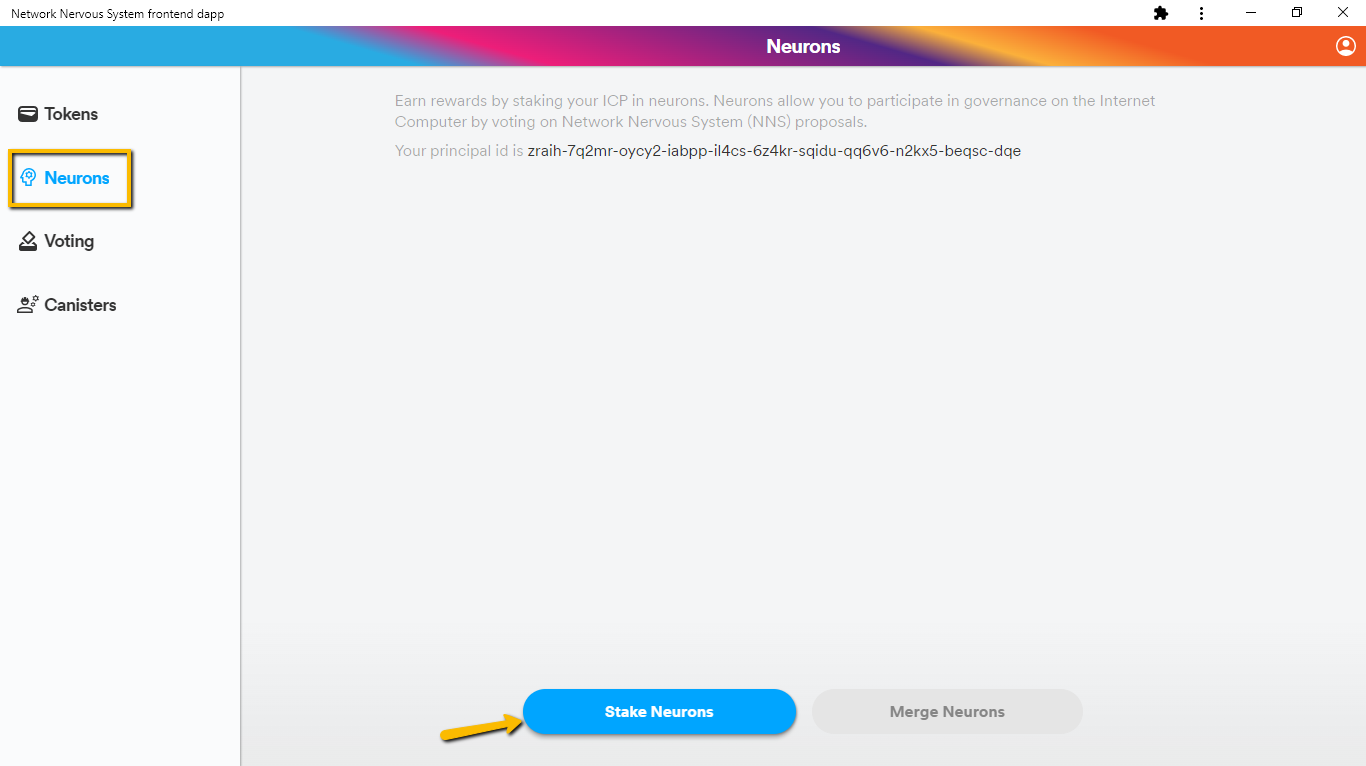
Step 12: To stake your ICP, click on ‘Neurons’ and then click ‘Stake Neurons’. Select source account that holds your ICP.
What are Neurons?
Your ICP tokens once transferred to the NNS and staked or locked over a period of time, create the neurons. Neurons help stabilize the governance of the Internet Computer.
The neurons allow you to participate in Internet Computer governance to earn rewards.
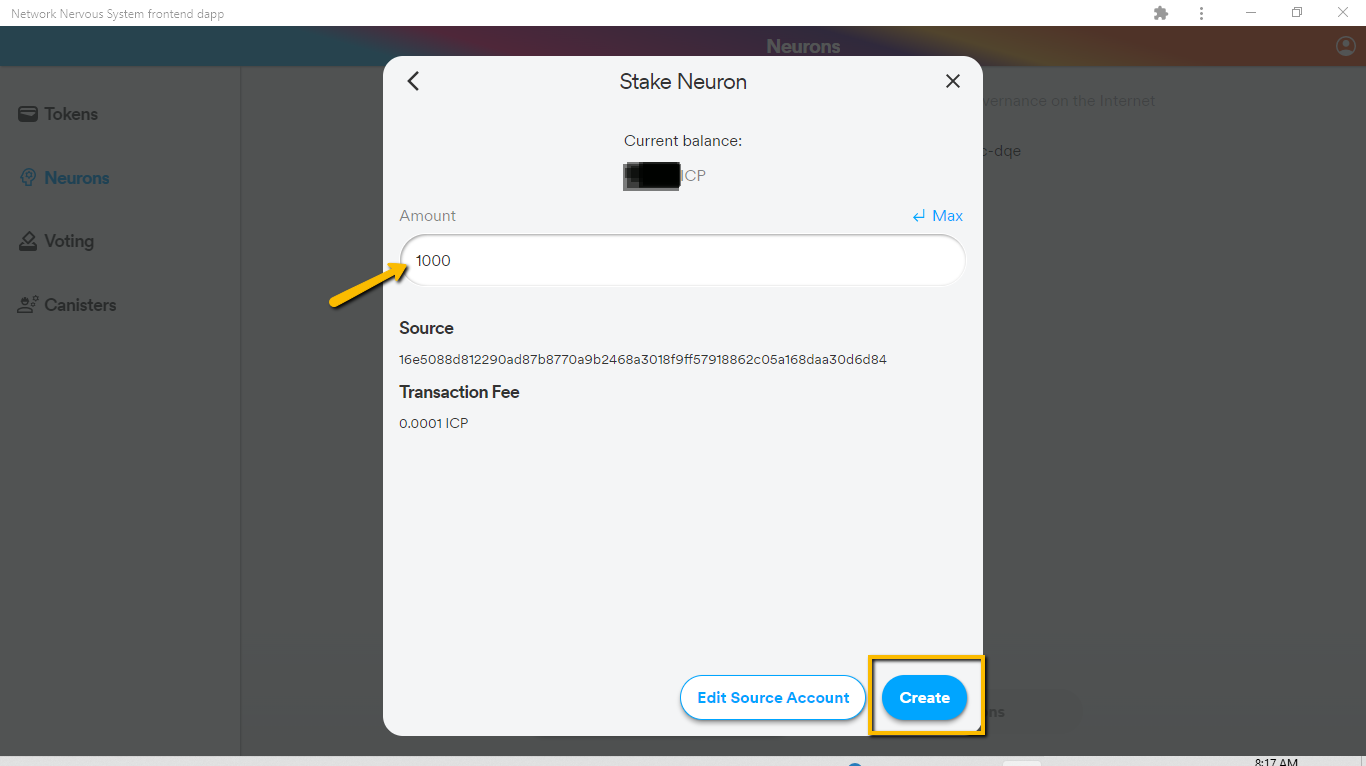
Step 13: Enter the amount of ICP tokens you want to lock into the system and then click ‘Create.’
Other elements on the NNS dapp
Besides the Neurons button that we’ve touched on in this demo, you should also notice the ‘Tokens,’ ‘Voting,’ and ‘Canisters’ buttons on the NNS dapp. What are their functions in the dapp?
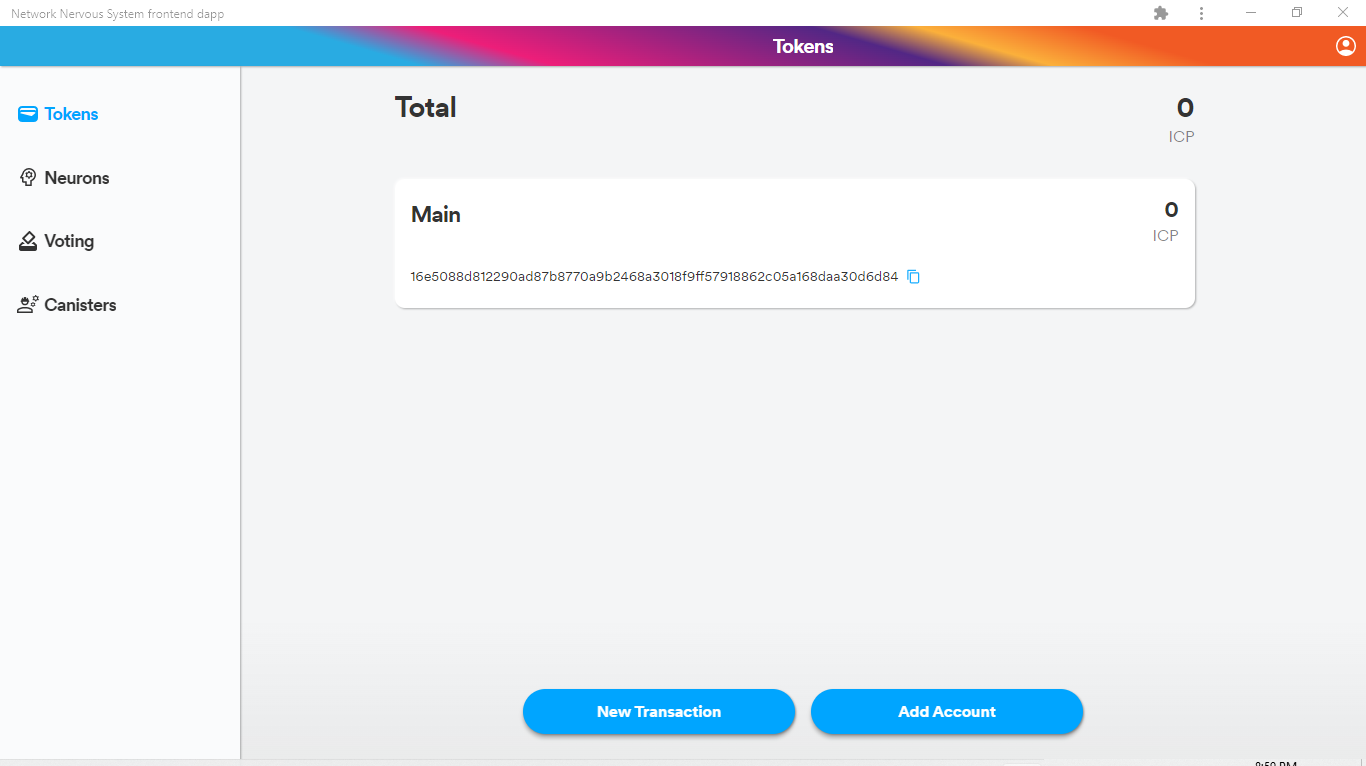
Tokens
The ‘Tokens’ section gives a general overview of the asset management dashboard. Click ‘New Transaction’ to send out tokens to an external address.
‘Add Account’ lets you create a new wallet account and then link it to the existing one, or you can link a hardware wallet to the existing one.
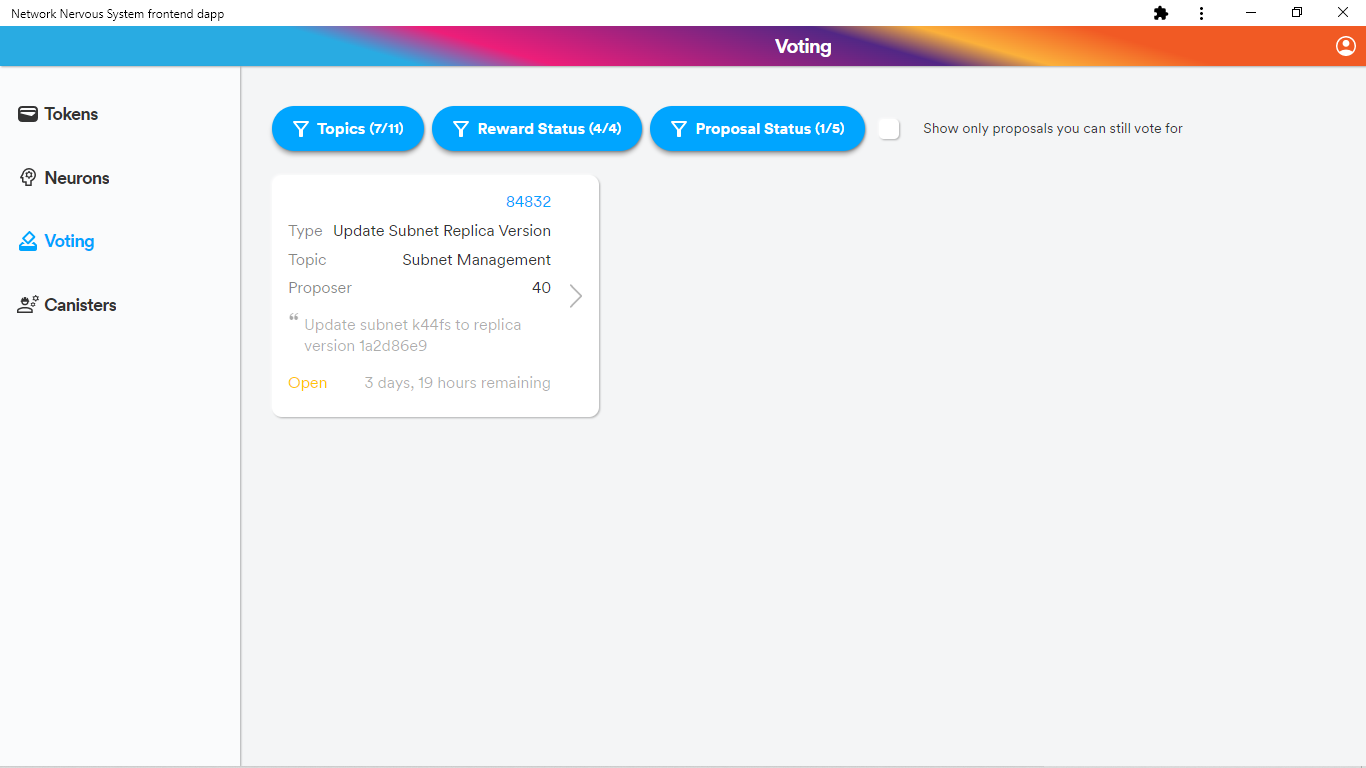
Voting
This is where you get the chance to participate in the governance of the Internet Computer. You can vote on proposal topics and have a say on how the Internet Computer is managed.
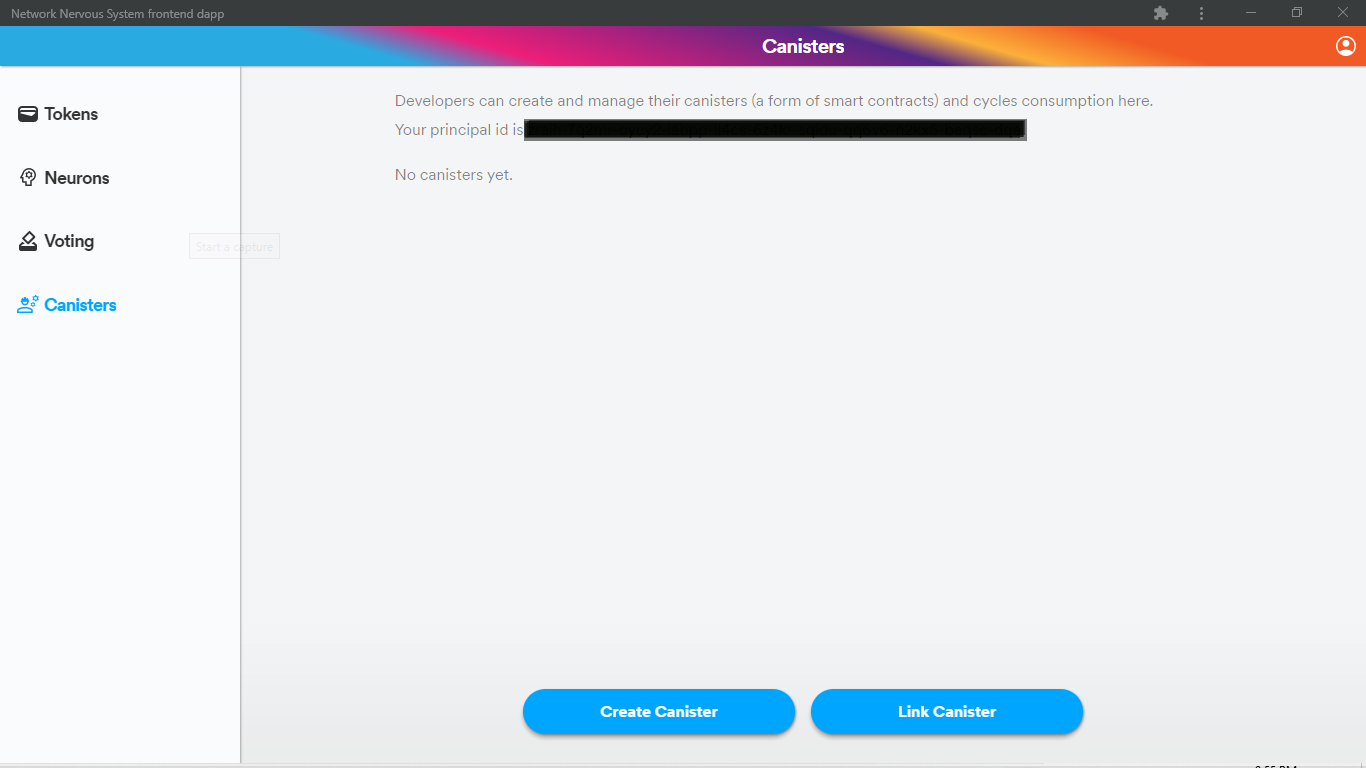
Canisters
Canisters are the building blocks of the Internet Computer, designed for internet-scale services. They are similar to smart contracts that allow developers to scale — interoperable compute units that bundle code and state.
A dapp built on the Internet Computer can be composed of one or more canisters. Some of a dapp’s canisters may provide web interfaces that end-users can access through their browser.
Maturity, Dissolve Delay, and Interest rate on ICP staking
Maturity is the amount of ICP you earn after staking, divided by the total amount of ICP you staked in the neurons.
Dissolve delay or lock period is the duration of the time you agree to lock away your tokens. On the Internet Computer, the least dissolve delay period is six months, while the most prolonged period is eight years.
Interest is the percentage yield or profit you get based on the amount of ICP you locked over a period of time (dissolve delay).
For example, John locked up 1000 ICP tokens for two years in the NNS staking dapp. John can withdraw his staked ICP in 2 years (maturity period) on the day that corresponds with the time he first staked his tokens. In addition to his 1000 ICP tokens, John will receive an extra 424.82 (18.1%) ICP tokens as a reward for staking.
Generally, the longer you lock up your token, the higher the percentage yield or rewards.
We hope you've found this guide useful, and now have an excellent understanding of how to stake your ICP.
Connect with InfinitySwap
Twitter | Website | Telegram | Discord | Github

*Disclaimer: While every effort is made on this website to provide accurate information, any opinions expressed or information disseminated do not necessarily reflect the views of InfinitySwap itself.


Comments ()